Methodical Madness

After many fits and starts, I’ve completed the second story of the Cape house!  I never thought I would type that sentence.  The kitchen nearly drove me to drink, but the bathroom…?  Good thing its window was too tiny for me to squeeze through and throw myself out only to sustain a head injury and wander cluelessly into the freezing surf of the Atlantic ocean.  Truth is, it all came pretty close to being smashed to bits with a hammer on multiple occasions.  I even considered subjecting the tiny inhabitant to “powdering her nose” (as she likes to refer to it) in an outhouse and taking sponge baths in the kitchen sink.  But now…I’m almost happy with that confounded bathroom!

But let’s start with the bedroom.
P1000871

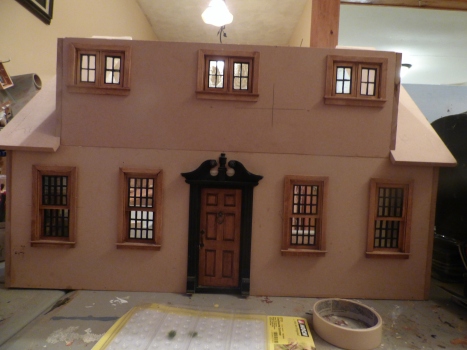
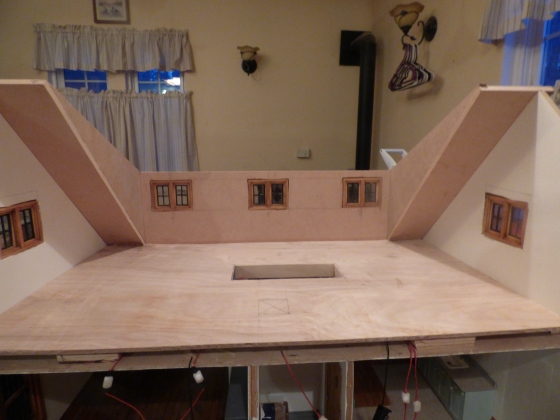
Just to recap from about 150 years ago, my darling hubby added a shed dormer to make more living space for bedroom and bathroom…
P1010015

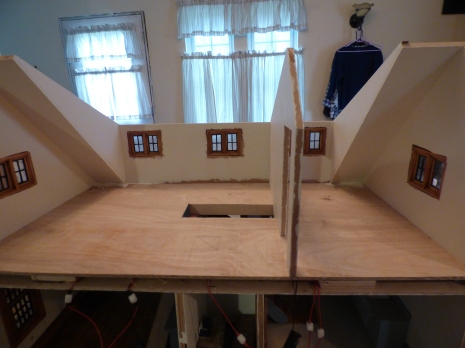
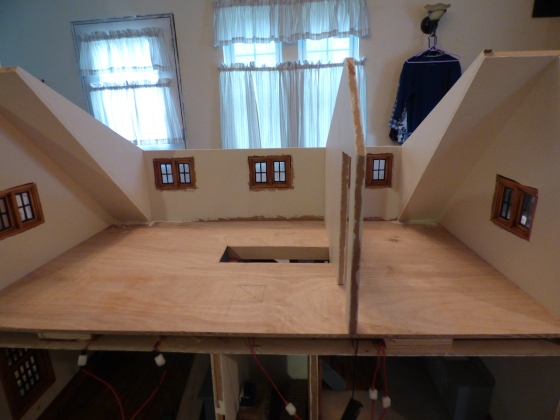
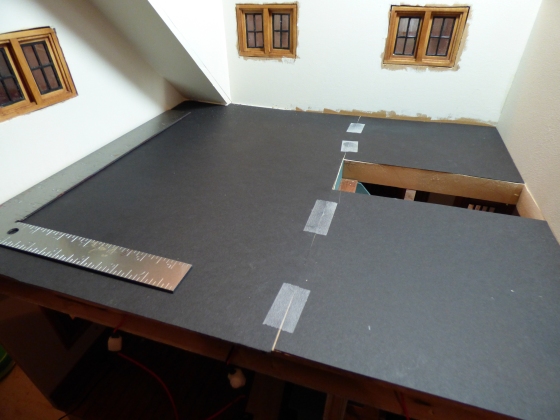
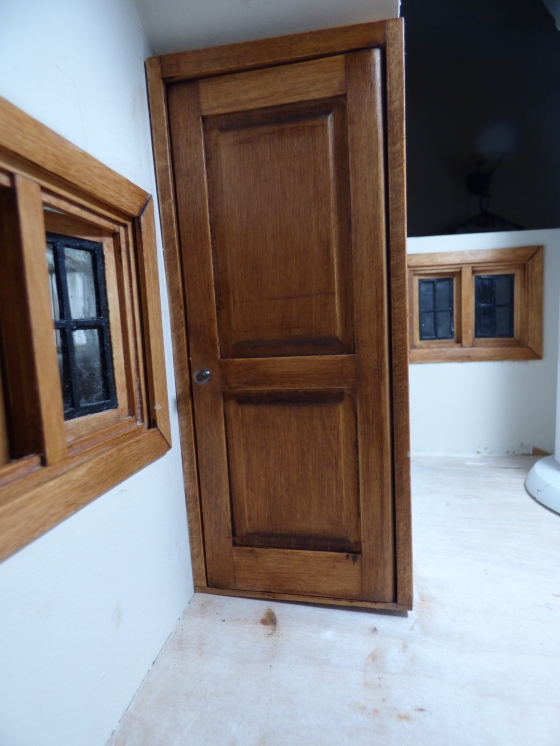
…then put up the dividing wall.  I can’t find any pics of the ensuing chaos and construction/destruction/reconstruction of these rooms, but next steps were the usual floor lay with poster board sub flooring.
P1010021


P1010701

Hubby helped me build a closet by enclosing the odd niche under the dormer roof.
P1010705

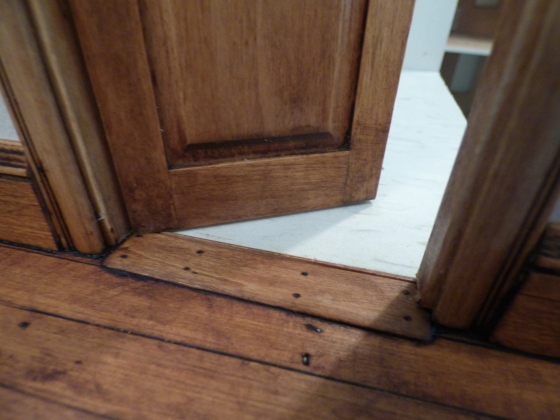
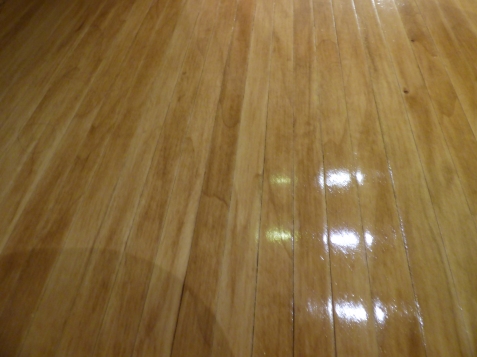
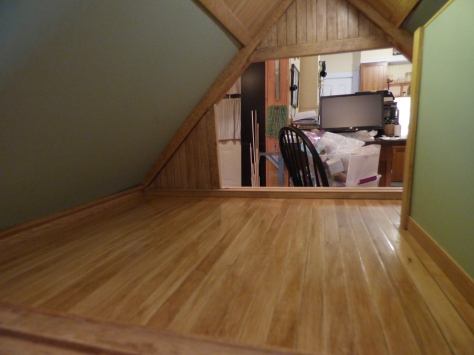
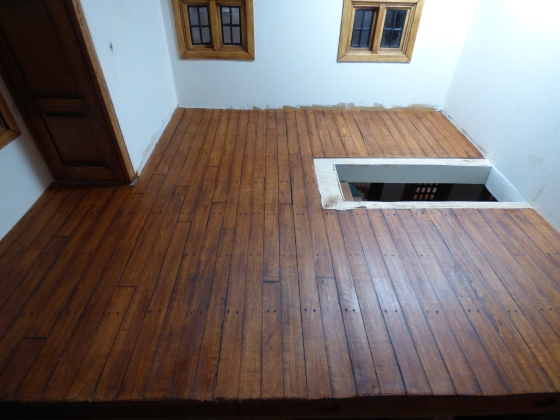
I cut boards from thin basswood and glued them to the poster board, then sanded and stained the floor with Minwax Ipswich Pine.  And yes, I drilled tiny holes in the boards and then tapped in a bunch of HO scale railroad “spikes” to simulate the old black nails with rectangular heads that were common back in the day.  I never want to see another one of these spiteful little pieces of metal as long as I live.  I finished the floor off with some Mylands mahogany wax to age it.
P1010713

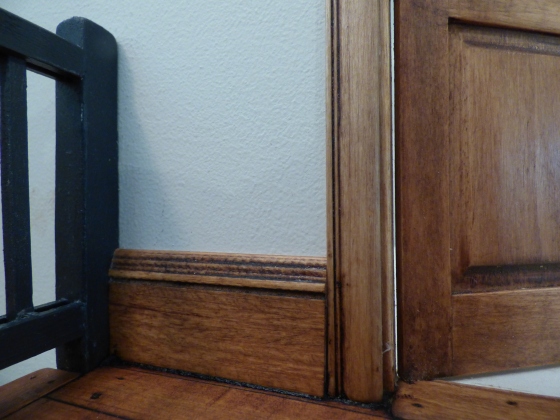
I love these tall baseboards!

P1010715

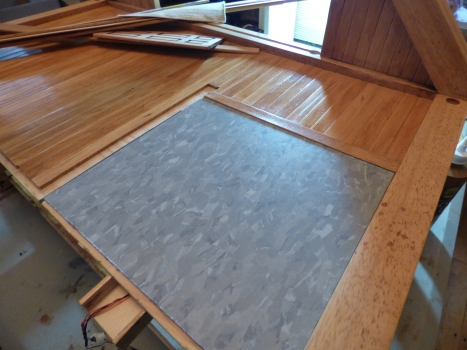
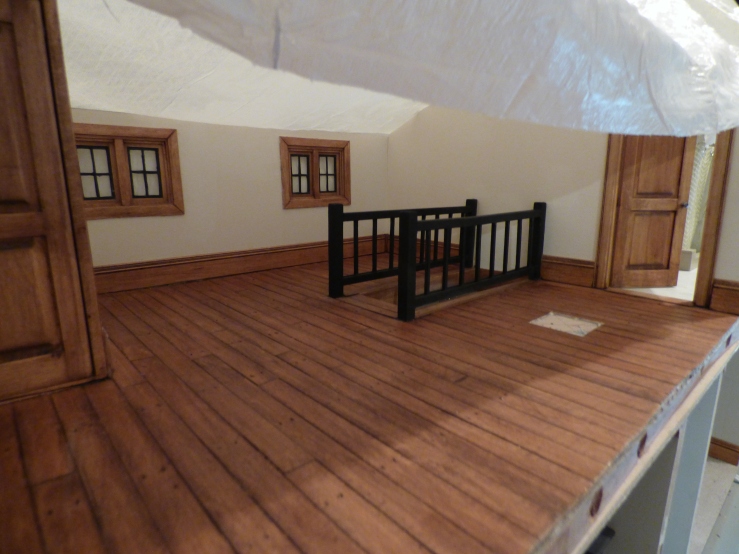
I added a threshold between the bedroom and the bathroom tile floor, which is just a tad higher.  I tried to make the threshold look as though, throughout the decades, tons of people had been through the door.  With full bladders.  Hah!
P1020553

Finally, I cut a hole in the floorboards to accommodate the exposed chimney.  I can’t put that in until the part of the roof which it penetrates has been added.  I’m sure a good time will be had by all on that particular project.

On to the bathroom!
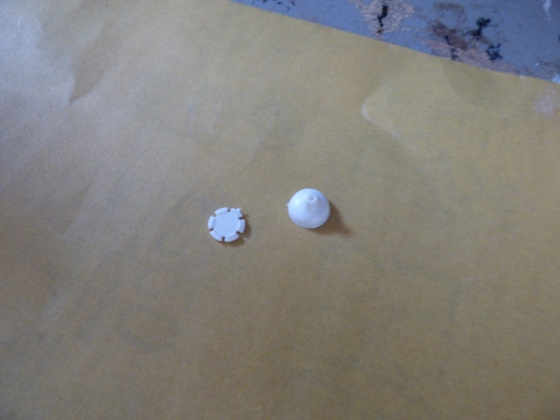
P1020418

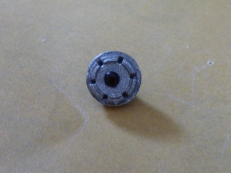
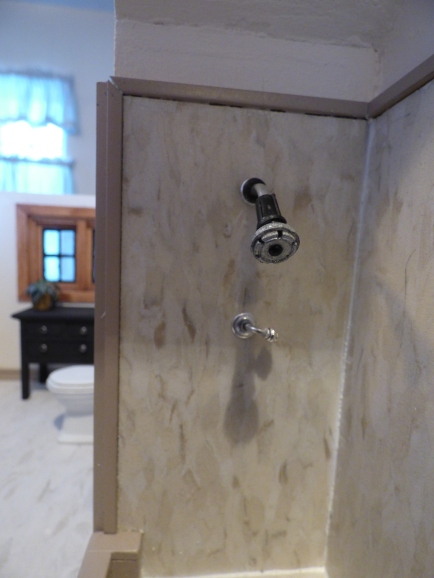
These little bits of plastic saved my sanity.  The shower head was driving me to the brink of madness.  I couldn’t find anything that worked.  I even bought a shower head with attachment from Marion Russek’s shop on Shapeways.  Never one to leave well enough alone, I cut it all into bits for the sake of “realism” and attempted to graft the shower attachment onto a tiny Legos hose. I also spray painted the heck out of them, but Shapeways stuff tends to have this funky texture and the more I sprayed, the worse it looked.  Into the bin.

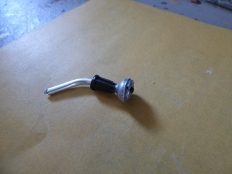
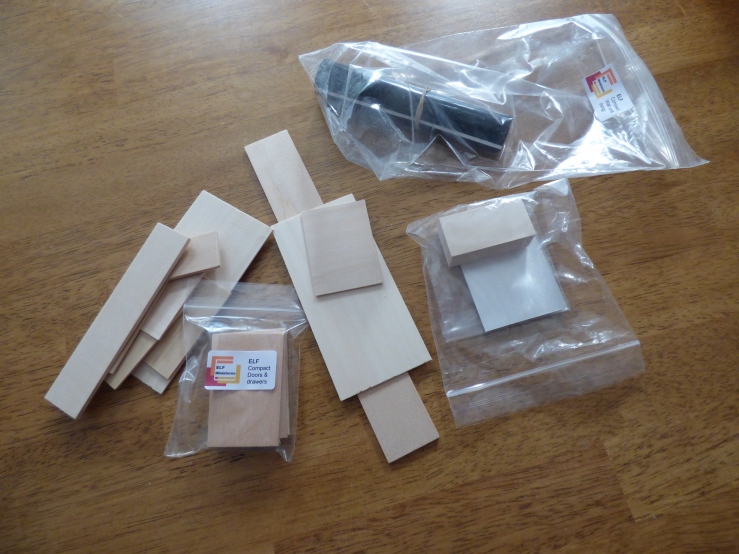
Then I bought a Chrysnbon bathroom kit and found those little doohickeys.  What are they for?  Beats me!  I think one of them is part of a plunger, but the little star like thing – well, your guess is as good as mine.  But these bits, gingerly spray painted silver, along with a few other things:
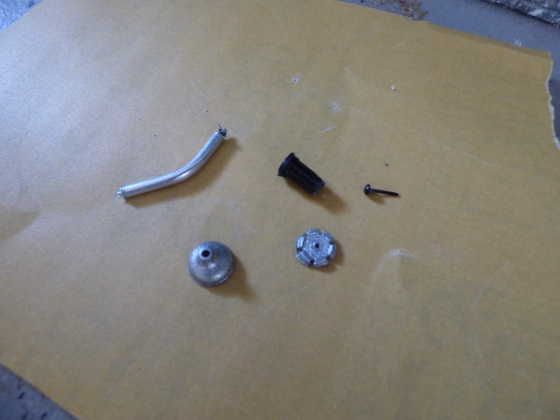
P1020424

Came together as:

P1020420 and then this: P1020423 and

I finally got that:      P1020464

OK.  I was on a roll now!  Jodi at My Miniature Madness had kindly given me photos of HOM kits she had modified to serve as fantastic bathroom vanities.  Scrounging in my stash, I couldn’t find any of the kits she had used, but I did have a dry sink I got as part of a  lot.  I also had a bowl sink salvaged from my ill-fated ELF Miniatures bathroom kit, which ended up almost as big as a disaster as my ELF Miniatures kitchen unit. Both of these catastrophes dwarfed the sinking of the Titanic.  ELF and I DO NOT GET ALONG.

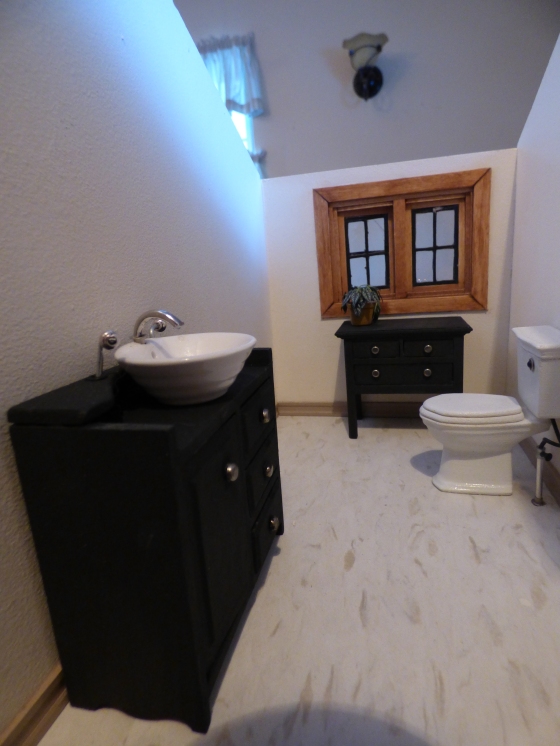
Anyway, I carefully constructed the dry sink, leaving off the decorative panel at the bottom and top, and painted it with black Folk Art Home Decor chalk paint, then used dull silver brads as knobs.  I fiddled together some hot and cold water taps that look vaguely like the handlebars of a Harley et voila!
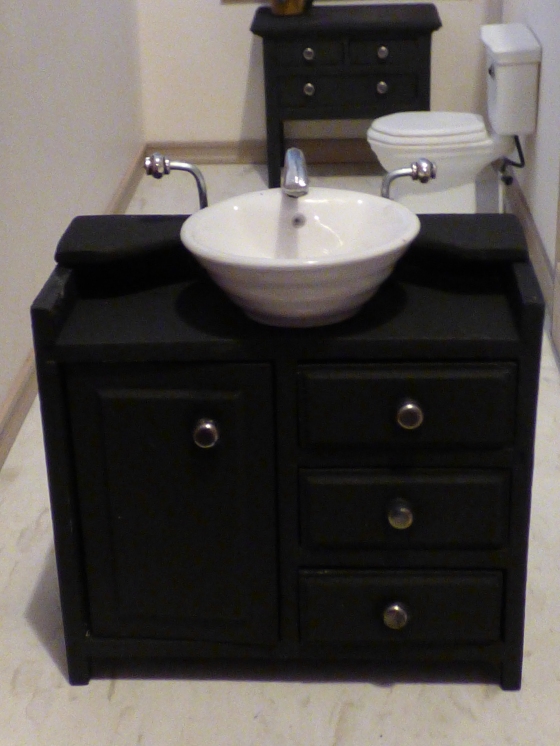
P1020474

THANK YOU, JODI!!!!!!!!

Next, the shower curtain rod.  I had considered doing some sort of “glass” enclosure for the shower, but I was OBSESSED with having a shower curtain.  I looked online and found that there are, indeed, curved shower curtains that don’t require being wired to the ceiling. (A nightmare of epic proportions I was totally dreading.) So, with some aluminum tubing and some metal beads, I came up with this:
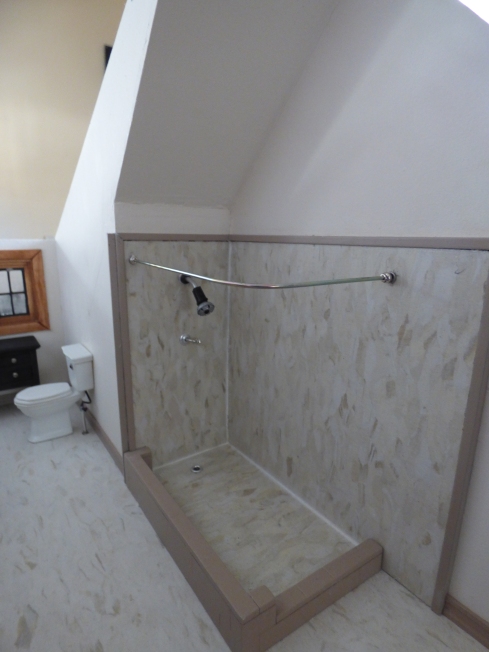
P1020484

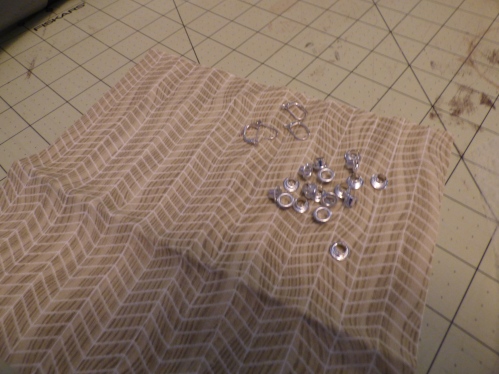
Working quickly, before inspiration failed me, I cobbled together a shower curtain using a bit of fabric, eyelets and earring wires.  The kind that clip.  Because I had epoxied the shower curtain into place before realizing I needed some hooks for the curtain.  So I had to have shower curtain “rings” that would clip on over the rod.  Either that, or yank it out of the wall.  Uh, NO.
P1020519

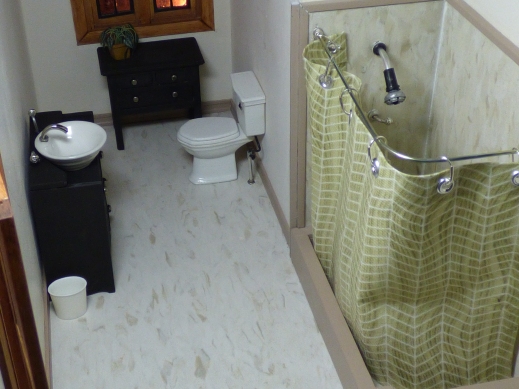
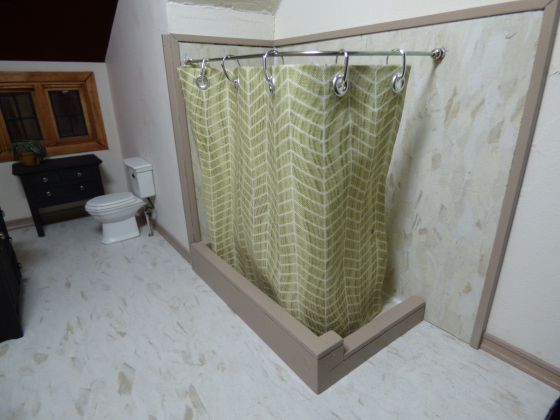
And here it is, the bathroom with the shower head, the rod and the curtain, as well as the lovely vanity and table:
P1020527

P1020521

OK, really, I don’t like the huge hooks and eyelets.  So I’ve ordered much smaller eyelets and will have to find another way to hang the curtain.  Those big hooks have gotta go!  But all in all…I think it came out OK.
P1020467

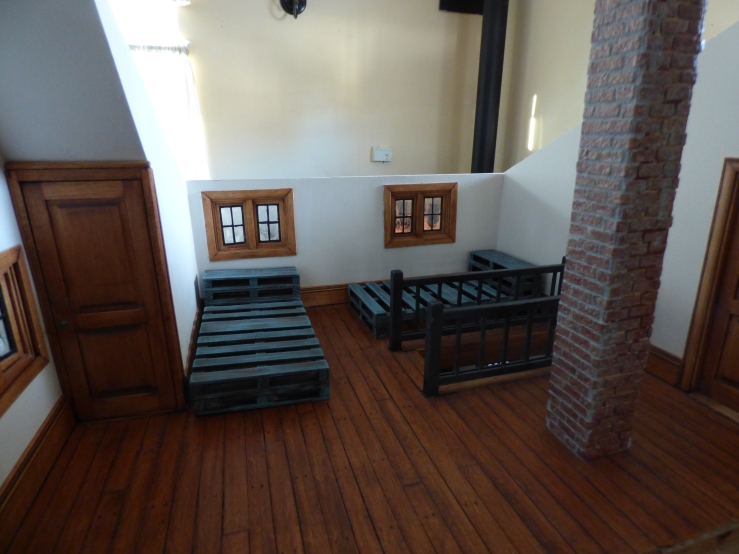
Up next: the roof and second floor lighting.  Let’s end with a scene of the bedroom with some proposed pallet beds included.  I bought 6 miniature pallets from Mini Materials, then cut, glued and reconfigured them into twin beds with short headboards to hold a lamp, pictures, alarm clock, glass of water with false teeth in them, what have you.  I stained them with Minwax Dark Walnut, then dry brushed with Waverly Chalk Paint – a color called Agave.  I’m not sure I totally like them, at least not in this house.  They just seemed quick and easy beds to fall into after a day at the beach.  Or crawl into after a night at the dive bar down the street.  Decisions, decisions!
P1020488


Heading Down the Home Stretch

And  boy, are my legs tired.

I thought I’d finish the year with a bang and update the status of the Cape house.  I can see a dim light at the end of a very long tunnel with the near completion of the second floor.  The bedroom needs only to have the exposed chimney installed, and the bathroom needs only a shower rod and curtain.  Dang!  I have to give myself some credit for getting this far.  Especially when I interrupted the house AGAIN to work on yet another project – upgrading a PlanToys dollhouse.  So I’ll end the year with that little project instead.

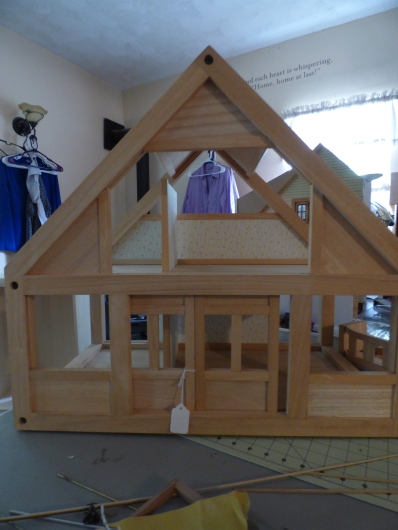
Here’s what it looked like when I bought it at a giant indoor flea market:

P1020050

I won’t bore anyone with too many details of this painstaking metamorphosis.  This house was simply a frame with large opening for little hands to reach in, so there were no solid exterior walls and definitely no room for wiring.  The challenge was to upgrade it to a house for an older child or adult using only whatever I already had in my monumental miniatures stash.  I did end up buying some sheets of wood for flooring and interior panels, and some rubber grommets for the lighting, but everything else was rummaged or filched from stock on hand.

P1020350

I put down basswood strips for simulated hardwood flooring, stained and polyurethaned them.

P1020347

I painted the small existing “walls” which were really just thin panels separating the rooms on each floor.  I installed interior walls where there had just been large holes and painted them, and used more basswood strips to “panel” the interior walls.

P1020111

I used vinyl flooring from Lowe’s for the kitchen and bathroom.

P1020334

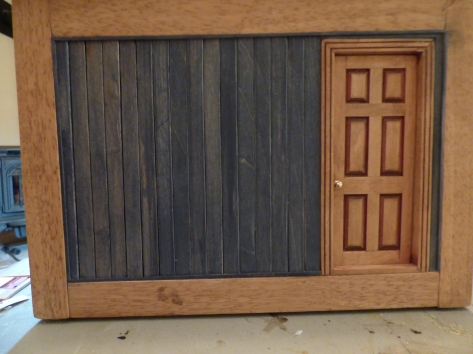
More basswood strips, stained with Varathane Worn Navy were used on the exterior.

P1020086

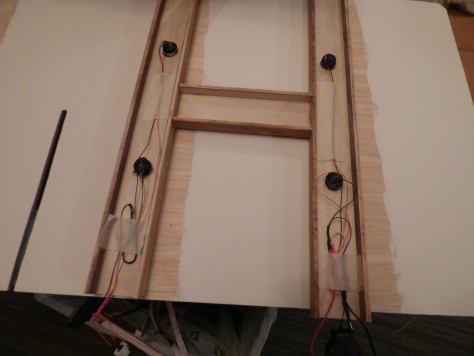
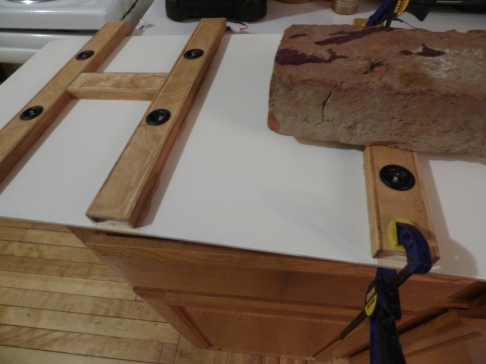
There were absolutely no suitable crevices for lighting, so I decided to make big beams for the first floor ceiling to hold the lights and wiring.

P1020089

I spray painted extra large eyelets flat black, then inserted rubber grommets into them.  The LED lights were then poked through the grommets and held in place with some gummy old Quick Grip I had lying around.  I even learned how to solder so that I could do some of the electrical work.  I was certain that, in a freak accident, I would gouge out an eye with the soldering iron, or impale my hand with it, but managed to finish the job without a trip to the ER!  The upstairs lights were installed in a partial roof portion that came with the house and which I fancied up with more basswood panels.

P1020339

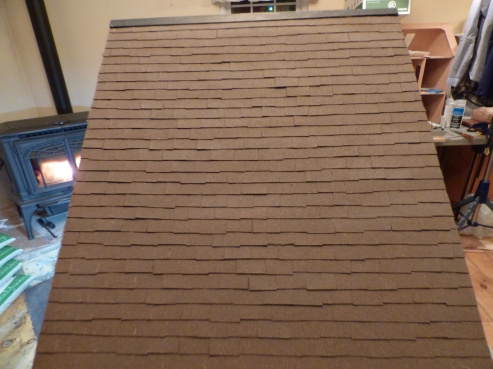
Final touch was a foam board roof and shingles cut from all the cardboard cereal boxes my husband has been conscientiously donating to my stash.  After gluing the shingles to the foam board roof sections, I painted them with a base of brown acrylic paint and then spray painted the sections with Rustoleum textured paint.  Makes the cardboard bits look like asphalt shingles.  I’m going to use cardboard on my Nantucket B&B house since it came out so well!  And much less expensive than the Alessio Miniatures asphalt shingles I bought for the Cape.  I’ll try to make them a more uniform size and shape, however.  My husband claims that the uneven shingles and the straggling rows adds to the authenticity of the roof.  Yeah. Right.

I partially decorated the interior using stuff from the Cape house for photos used on Craigslist.  I’m trying to sell the little bugger.  No bites so far, but I’m hopeful!

P1020317

P1020320

(Incidental Brag: I made this sink myself from instructions on 1 Inch Minis by Kris.)

P1020341

So, that’s that.  Finished!  Hopefully out the door soon, to make room for the Nantucket.  The second floor of the Cape is another post for another day.

Happy New Year!!!


This Old House

P1010807

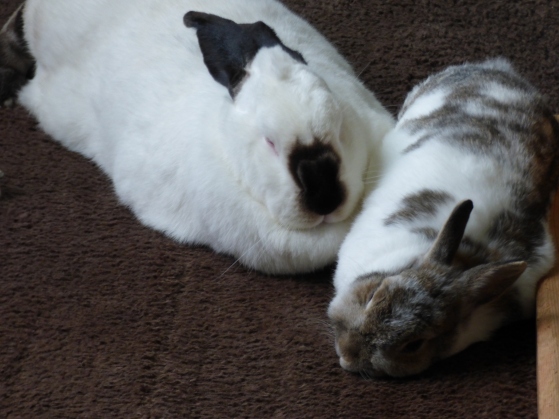
Merri and Dunkin, my pet rabbits with whom I live in indentured servitude and who graciously allow me to also maintain a full time job to pay the rent and buy their food and toys, are bored.  My work on the Cape house is agonizingly slow and they can’t even pretend a polite interest any more.  They’ve offered to “reboot construction” which translates from bunnyspeak to “gutting the place with their cute little buck teeth and rehabbing it as a crash pad for napping rabbits”.  After serious consideration, I’ve declined.  So they went back to sleep.

Honestly?  I’m bored, too.  Mainly because nothing seems to turn out quite as I had intended.  I’ve been stalled out on the bathroom for more agonizing weeks than I care to admit, stymied on shower fixtures and a vanity.   I had bought a bathroom kit from ELF Miniatures.  The little bathrooms on their website look so flipping’ cozy and realistic!  But, like their kitchen kit that nearly drove me to drink (and that’s a short trip, at the best of times), the bathroom kit resisted all my attempts to make it cozy and realistic.  My bathroom ended up looking like those gas station privies that, after opening the door and taking one good look (never mind the smell), you resolutely shut the door again and walk briskly away, assuring yourself that you can hold it until the McDonalds at the next off-ramp.  ELF Miniatures kits and I DO NOT mix.

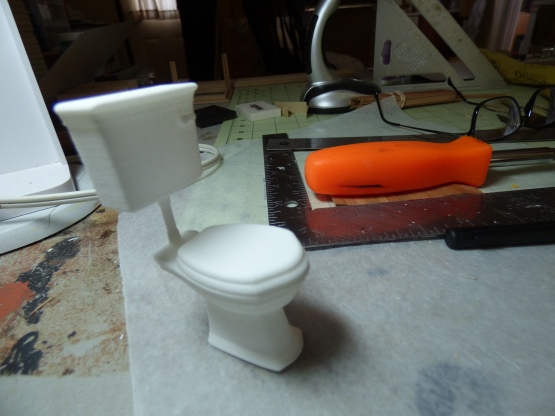
Resolutely, I decided I would just get on with it piece by piece.  I bought a toilet from Shapeways, which was originally something like 1/32 scale.  I asked the designer if he could make it 1/12 scale for me and he obliged!  Shapeways people have been very kind with all my odd queries.  Here it is before I started meddling with it:

P1010828

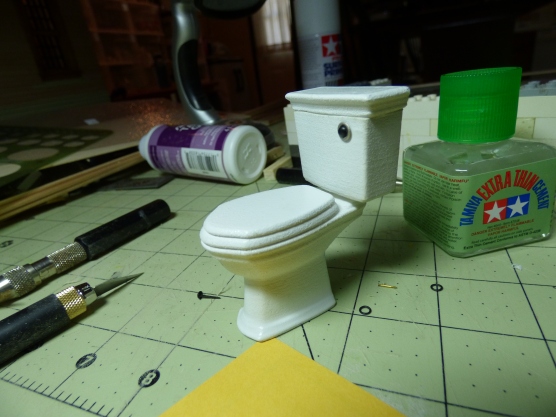
I didn’t like the tank sitting up so high, so I used a craft knife to remove the “pipe” between it and the base.  In addition, I was concerned that because the toilet was all one molded piece, once it was spray-painted there would be no realistic space between the toilet base, seat and lid.  So I took a craft knife to it again and carefully sliced everything apart, including removing the tank lid.  I even hacked off the little flush handle because it wasn’t quite right. Because that’s the anal-retentive way I roll.  After each piece was spray painted, I glued it all back together.

P1010835

See the lovely gaps between the base, the seat and the lid?  There was a method to my madness! I was pretty happy with the result except for the funky, oversized flush button I had to fashion after the traditional metal handles I attempted fell apart.  Sigh.  Also, the toilet has this funny, gritty finish to it – almost like little pockmarks – that can’t be disguised with spray paint.  I really wanted a smooth, porcelain-like finish, but no matter how many layers of paint I put on, the gritty look remained.  I tried sanding it lightly, but no dice.  I’ve had other Shapeways miniatures with this bumpy skin on it, so I’m assuming it’s inherent in the plastic.  I’m trying REALLY HARD to ignore it!  And that damned button.  What was I thinking?!

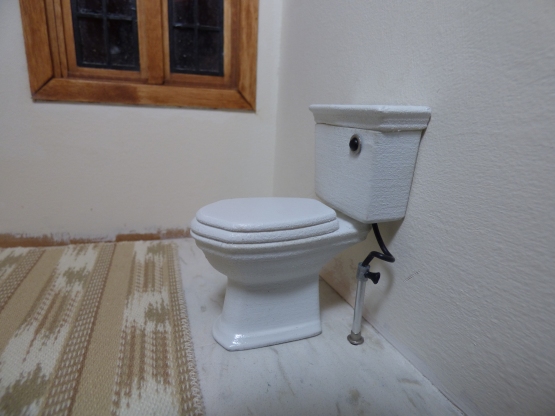
P1010851

Here is is, installed.  My husband helped with the whatsamajiggie that brings water up into the toilet through that little pipe with the flexible tubing on it.  He rummaged in his model train supplies for the parts.  He has all manner of squirrely little plastic bits and pieces that can used for 1:12 scale plumbing or appliances.  I highly recommend getting buddy-buddy with an HO scale model train enthusiast and then pilfering their stash while their back is turned.  One dark night, I’m going to sneak out these insanely cute minuscule bolts that will be perfect for the sink drainpipe.   Shhhhhh!

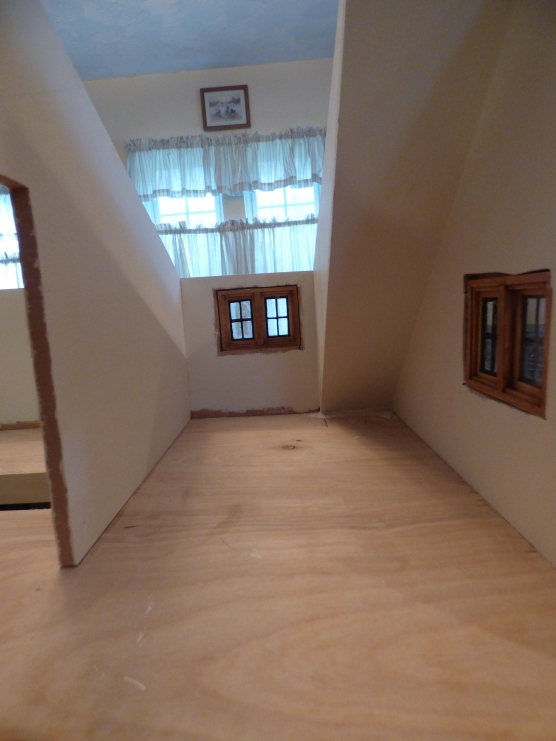
I’m getting ahead of myself!  This is the bathroom space I had to work with:

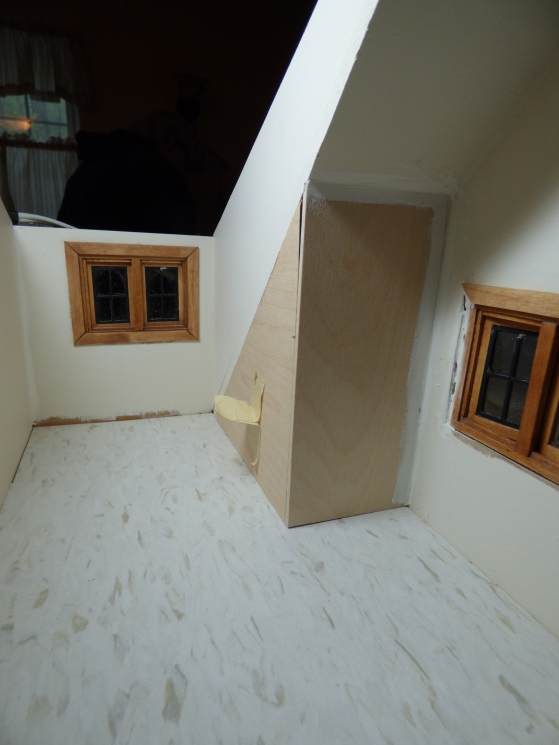
P1010016

I decided right away that the squishy little space under the eaves was of no use whatsoever.  OK, OK.  So really I was going to put built-in shelves there, but quickly realized that way lies madness, so abandoned the attempt.  Instead, I blocked it off to provide a wall behind which the “plumbing” for the shower would reside.

P1010433

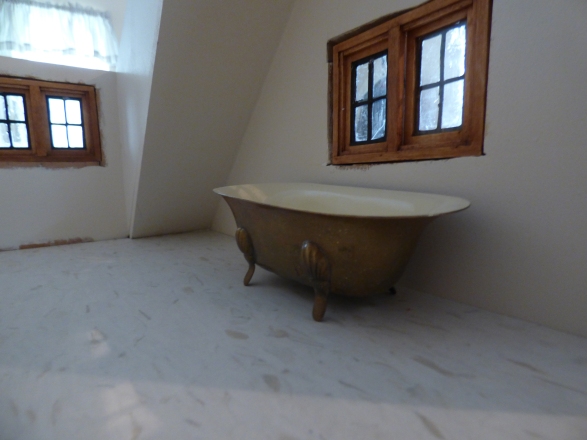
I had originally wanted to use a tub in this space.  I’d seen Brae’s method for spray-painting a glossy porcelain interior on a Crysnbon tub on her Otterine Miniatures site, and replicated it on one of those tub-shaped soap dishes you can pick up on eBay.  I love how it turned out! But I realized that in a weekend house, you’d probably just want to grab a quick shower after the beach, not waste time lounging in a tub while everyone else scarfs up all the lobster and guzzles down all the Sam Adams, leaving you with a lukewarm Diet Coke and some sad Doritos crumbs at the bottom of a plastic bowl.

P1010020

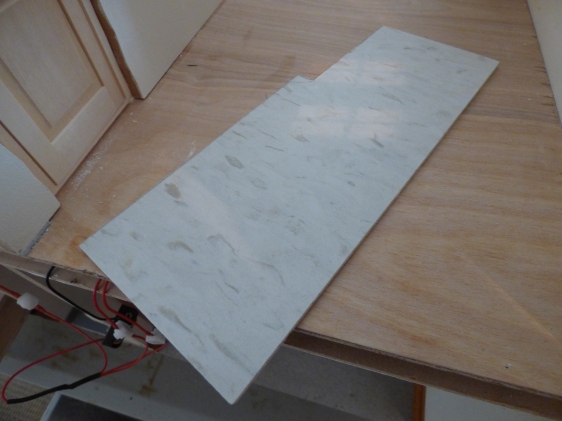
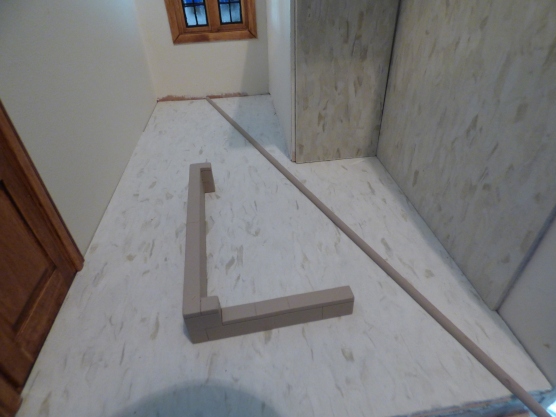
I had found some very nice flooring tiles from Lowe’s.  Not that vinyl stuff backed with adhesive.  These are very smooth, patterned on both sides, and snap cleanly after a few cuts with a sharp craft knife.  Once I decided on a shower, I used two complementary patterns with the lighter for the floor, and the darker for the shower enclosure.

P1010017

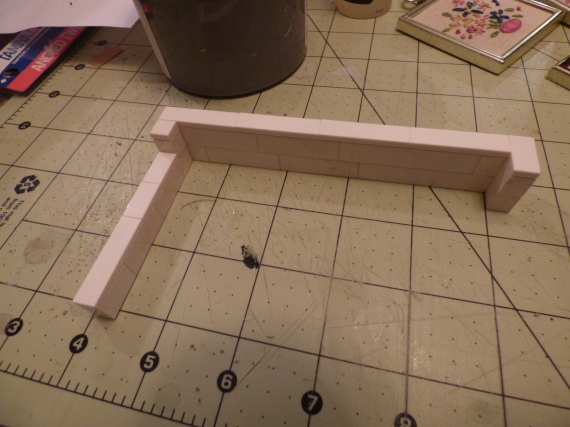
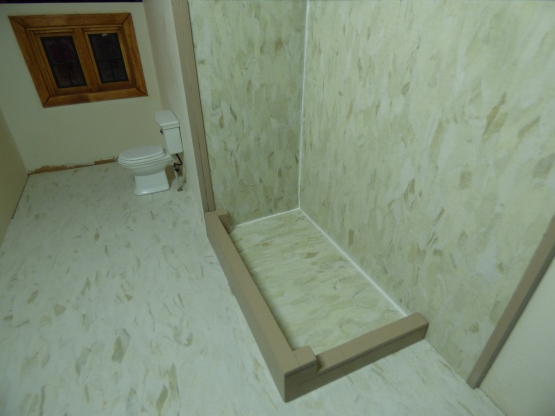
So, a walk in shower it is!  I have a tub full of old white Lego bricks, mostly discolored or stained.  I snapped some together to form the shower enclosure, then topped them off with Lego tile pieces to form a smooth surface instead of all those little bobbles on the bricks.  I sanded the whole thing down and then spray painted it.

P1010756

I also painted some square plastic strips in the same color for molding to enclose the entire shower area. Oh, and did I mention I had to bash out the second bathroom window and plug the gaping hole before I set up the shower.  ‘Cause I did.

P1010785

I used Liquid Nails to clue the whole thing in, then “caulked” the gaps in the shower with silicone goop.  Not too shabby!  Still need a drain, faucets, and shower head. And a caddy for soap and shampoo.  One thing at at time!

P1020026

The plan had been to put up a curved shower rod with a nifty shower curtain that would hang inside the enclosure.  Something adorable and nautical!  But my husband rather belatedly pointed out that in real life, the rod would have to be either supported by a pillar at the end of the enclosure, or connected to a metal support wired down from the ceiling. And that, in either case, you wouldn’t be able to close the curtain completely around the shower space.  Ohhhh…kay!

I was suitably grateful that he’d told me this long after I could have switched to Plan B.  Or even come up with a Plan B.  The man knows I have ZERO spacial or logic skills.  He was holding out on me for some mysterious, and obviously nefarious, reasons of his own.  Now I’m mentally fiddling about with the idea of a frosted glass door the length of the enclosure.  And how I can possibly fit it to the Lego construction without totally futzing it up.  There goes my totally adorable shower curtain.  Grrrr!

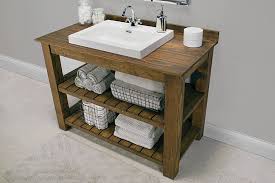
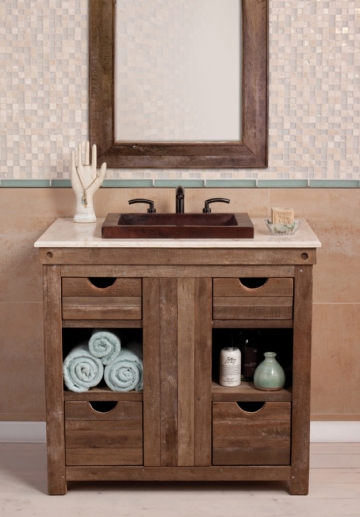
While I’m mulling that over, I’ve been attempting to find a bathroom vanity that is a. aesthetically pleasing and b. something I won’t screw up so badly it ends in the rubbish (after I smash it to bits out of sheer frustration).  This is what I want:

Rustic Bathroom Vanity

Or maybe this:

VNW361_Chardonnay_Vanity_v_size0

Hmmm….


We interrupt the regularly scheduled program…

mainly because I have a short attention span.  Which is why it’s nearly two years on and the Cape house is still uninhabitable for any person or persons tiny enough to fit therein, highly unlikely though that may be.  I’ve been doing things like HO scale train modules (I completed a replica of a ranger station set amid stately Ponderosa pines and sparkling waterfalls), Monster High doll repaints (epic fails – the poor girls look like victims of botched plastic surgeries done in the back room of a mechanic’s garage) and sewing stuffed animals (well, ONE stuffed animal…OK, just the HEAD of ONE stuffed animal).

And I briefly interrupted the Cape house once again by cheating on it with another house.  This one:

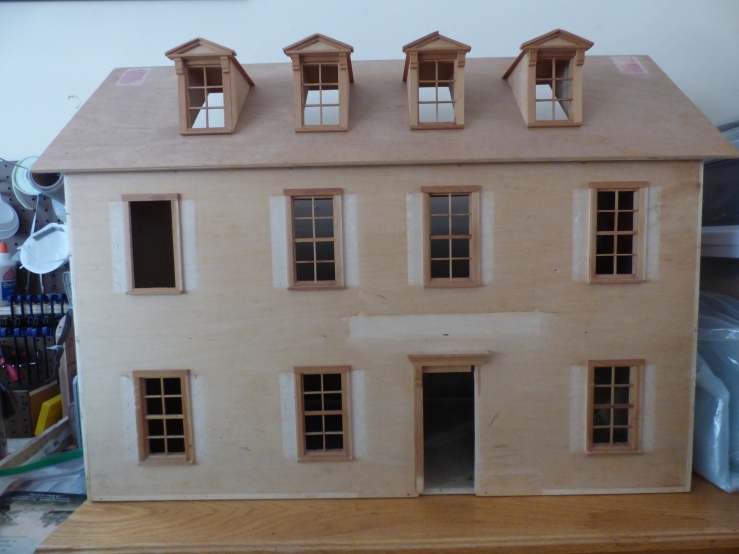
P1000760

Last summer, my boss cleaned out her attic and found this house.  Apparently, it had been sitting up there since 1993.  She immediately thought of me and my penchant for taking in homeless dollhouses.  It smelled musty, was littered with mouse poop and was accompanied by a bag of dollhouse furniture and accessories.  My husband and I carted it home, and put it in the back yard where we cleaned it out and sprayed it down with vinegar.  A few sunny days, and it was fresh and clean.

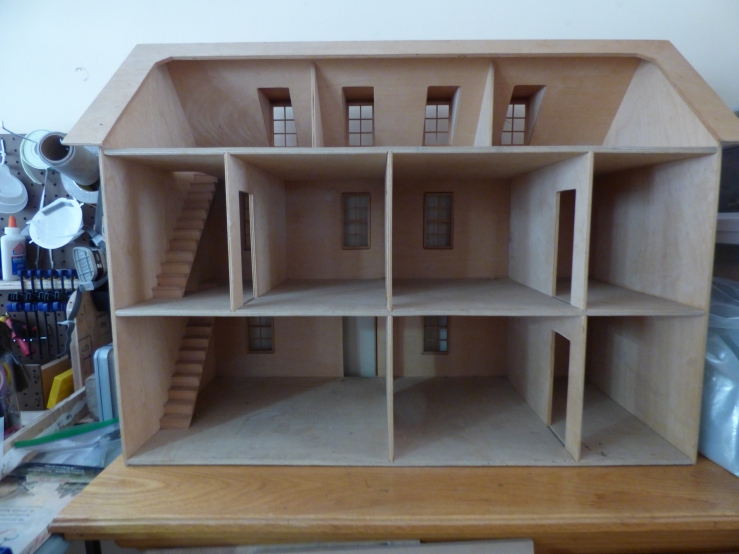
Here’s the inside:

P1000756

It’s a very solid, heavy house.  I think it’s either a RealGood Toys or maybe a Tom’s Mill.  I wasn’t crazy about the design, honestly.  I really love me a recognizably American colonial house and this thing looked sort of…dunno…early Victorian?  Or some vague, nondescript, generic dollhouse design?  I ripped off the shutters and the plastic chimneys, knocked out the narrow, cranky little staircases and popped out all the windows.  Then, for good measure, I pried off the dormers and the front door.

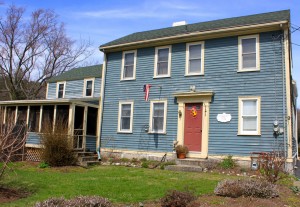
Then I did some research.  The house’s asymmetrical face disturbed my Georgian sensibilities.  A door with one window on one side and TWO windows on the other?  Horrors!  Who would do such a thing?!  Finally, my internet creeping was rewarded.  I discovered that I’m the proud owner of a First Period house.  “First Period houses have steeply pitched roofs, are asymmetrical due to having been built in phases, and feature large central chimneys.”  This is a First Period house in the flesh:

Benjamin_Dutch_1714_9_County-300x207

First Period houses were all the rage from 1626 to 1725.  Then, apparently, at 12:01, January 1, 1726, everyone then started building Georgian houses. Now, if you woke up in 1726, crawled out of bed and found yourself still living in a First Period house, you had two choices. You could either a) suck it up. It’s only a house, right? It keeps you warm (sort of) in the winter and keeps the wolves out. ‘Nuff said. You could even congratulate yourself on being 18th century retro. Or you could b) add a wing onto your First Period house and upgrade. This option was called Keeping Up with The Georgians. That’s a true historical fact, and you heard it right here.

Once I had determined its historical value, I cozied right up to that First Period house!  As we cuddled, it wistfully whispered that it had always longed to be a bed and breakfast.  On Nantucket.  Oh, joy!  I promised it faithfully that I would do everything in my power to make its dream come true!  My first effort was giving it a name: The Dancing Whale Inn.  Inspired by this:

9aaade22bde98b46b45b667a25827e7e

I did some more minor reconstruction: I plugged up the staircase holes.  No staircases!  The one in the Cape house nearly sent me around the bend.  All those little balusters that won’t stick and the whole things shattering into a million pieces if one of my rabbits sneezed upstairs.  Ugh.  I need to take a heat gun and some vinegar to a couple of the interior walls to move them, and need to build new dormers, fireplaces and exposed chimney.  All in time!  I’m committed to finishing the Cape, but will be nipping out from time to time to visit the Dancing Whale.  Just to walk around the rooms and kick around a few ideas.

In the meantime, though, I found a few little things that will be perfect for the Whale!

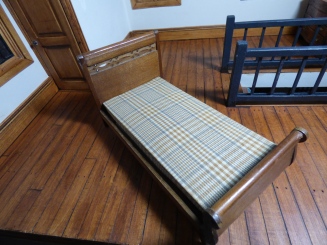
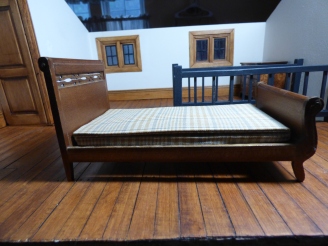
Like a Shackman bed I got on eBay.  I don’t usually like Shackman stuff – it seems a bit bulky, but I thought this bed was really cool.  I like the worn, antique look.

P1010743.JPGP1010746

I think the graduate student working at the Inn for the summer will like this bed in her staff quarters on the third floor.

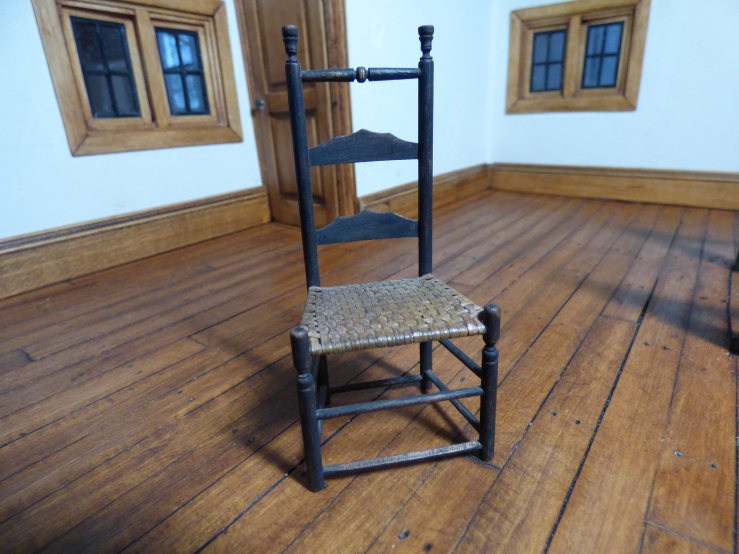
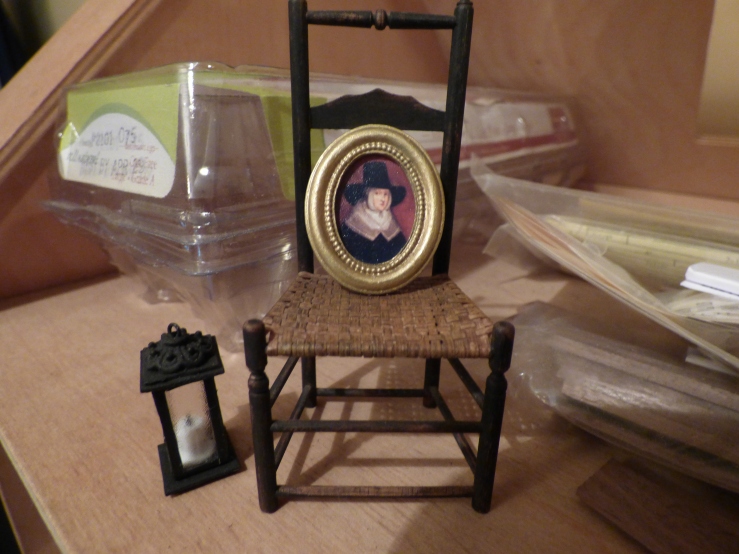
I found a terrific chair on Etsy, a signed artisan piece, which will look quite nice in the common area:

P1010742

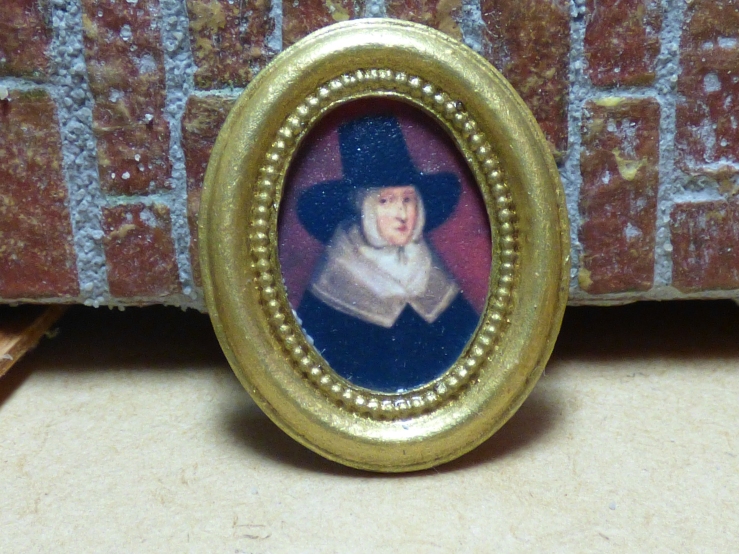
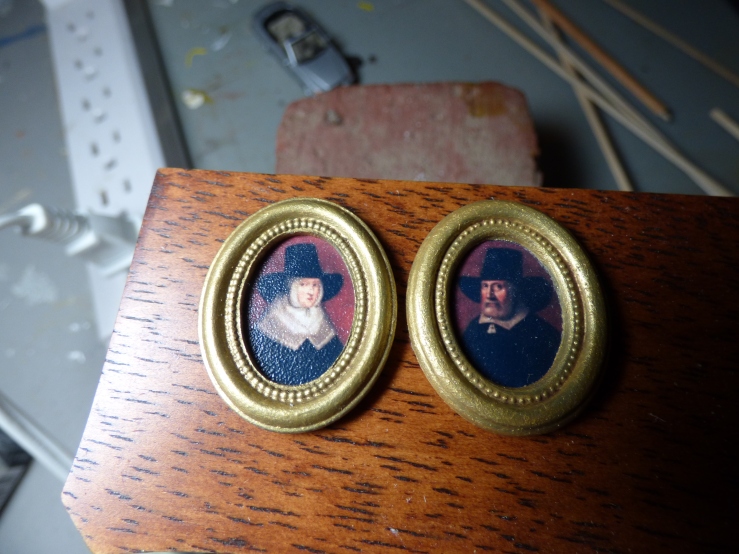
With maybe a picture hung above it?  I found this picture on the internet in an article about the New England Puritans.  I bought a stash of plastic “gold” frames, sanded the paint off and repainted them with Martha Stewart gold metallic, then printed off the Puritan portraits and put them in the refurbished frames.  Here’s the lady:

P1010755

And here she is with her old man:

P1010769

Aren’t they a cute couple?  Don’t they look like they’re peering at you to see what sinful shenanigans you’re up to now?  Like smiling?  Or being happy?  To the stocks with ye, ye shameless wench!

P1010770

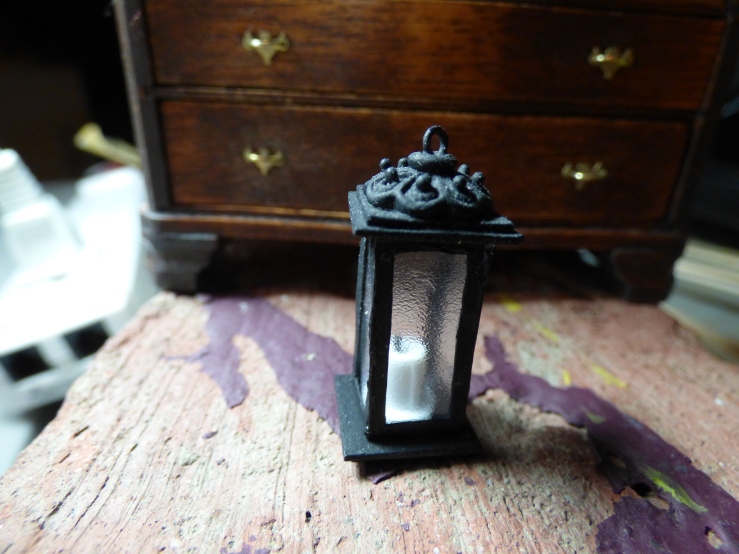
And how about this lantern?  I made it with the tutorial on YouTube by We Love Miniatures.  I think it will do nicely for the Inn.

P1010757

Concern yourself only with this artistically posed tableau.  Ignore the debris next to it and the empty egg carton behind it.

OK. I’ve done all I can until the Cape is ready for occupancy.  A LOT has been going on and I have a great deal of catching up next time.  I will try to keep on the straight and narrow and get the last brick and nail into the Cape before I pack my bags and take the ferry to Nantucket!


Let There Be Light!

And lots of other stuff.

Long time since my last post, and a lot of construction progress on the Cape Cod house.  I packed up all the household items to clear the decks and settled in to FINISH this house before monkeying around decorating it.  Even though the monkeying around is the best part.

First, on this Father’s Day, I’d like to thank my husband, and father of our furry children, for all this hard work on my house.  The hardest being listening to me swear a blue streak when the glue doesn’t stick, tiny bits of things snap off to be lost forever in the Bermuda Triangle of my work area, and the mini saw sends wooden shrapnel hurtling at me aimed with deadly precision at my eyes ON PURPOSE.

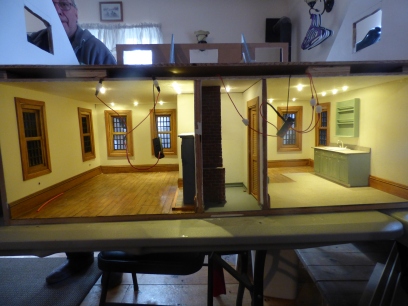
He single-handedly put the lights in on the first floor of the house despite the fact that I had never anticipated where to put the lights, didn’t allow for things like wires and grooves and little holes while I was banging everything together, and blithely assumed that everything would work out OK and I could lounge in the recliner binge-watching classic Dr. Who and eating Klondike bars.

And I was right:

P1000863

P1000864

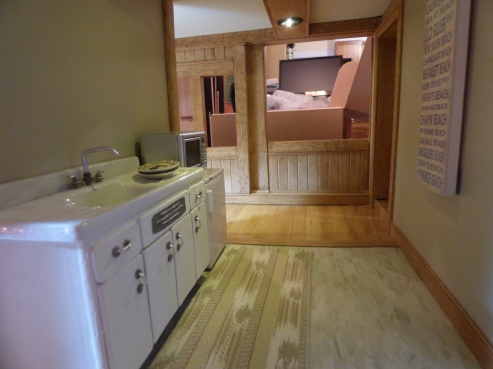
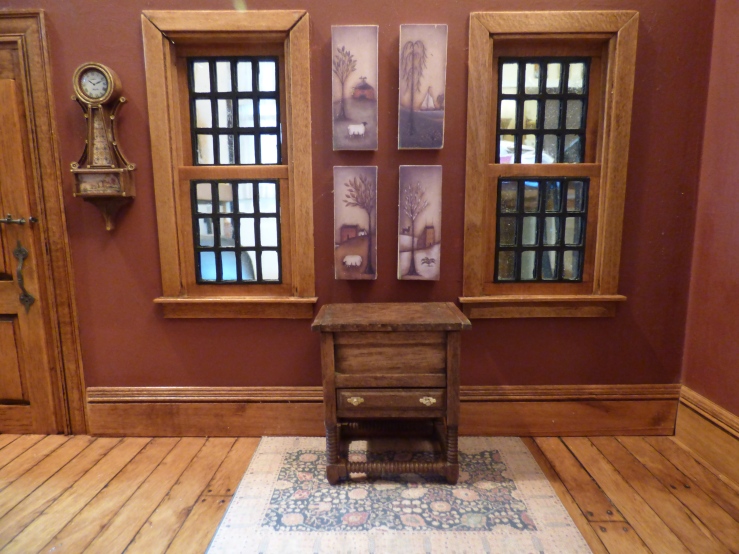
Doesn’t the kitchen look all nice and cosy with the lights on?  Granted, they’re sticking out of the ceiling without benefit of any sort of globes or fixtures.  He created a false ceiling for all those pesky wires, and then drilled holes to accommodate shorts bits of white plastic tubing to hold the lights.  There’s also a white plastic washer around each hole on the ceiling to suggest trim around recessed lighting.

But the lighting isn’t quite as recessed as I had hoped.  It’s a bit dim unless the bulbs are poking out of the ceiling like…dare I say it…a lot of tiny exposed nipples.  But that’s what happens when you don’t PLAN.  I’ll see about rigging up some globes to cover this shocking display at some point.  But general construction is the priority!

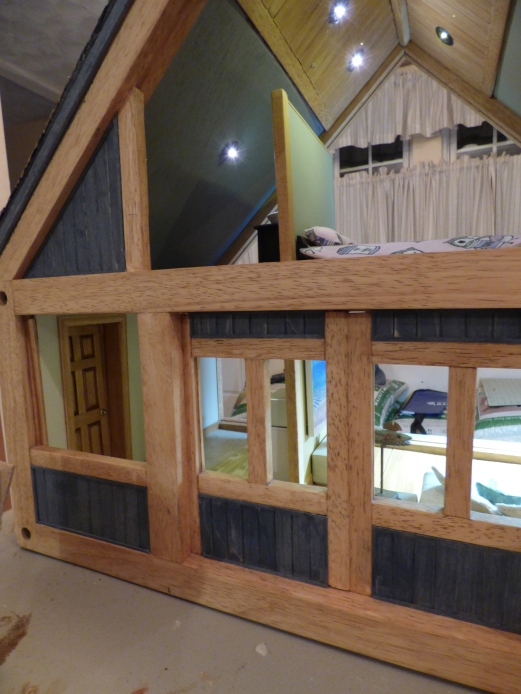
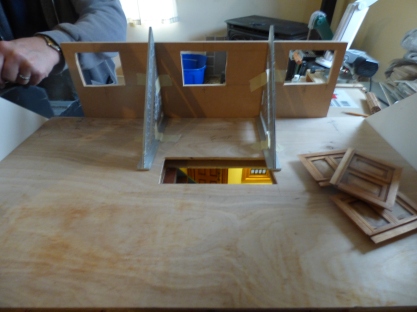
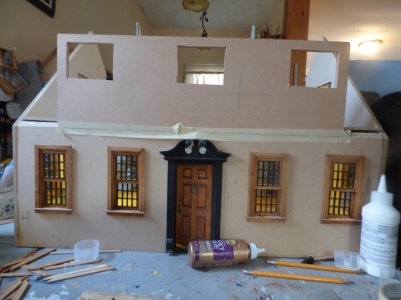
Next up, hubby constructed my shed dormer.  The kit had a simple sloping roof, but I wanted a roomy bedroom and bathroom, not poky little crawl spaces up there.  I did help with the dormer.  I put the glue on so he could stick it to the house.  He couldn’t have done it without me.

P1000865

P1000867

P1000872

Et, voila!

P1010015

Inside, I put up the wall to separate bedroom and bathroom and YES, I did this bit all on my lonesome.  I also put in these little swing out windows after putting some black mullions in them to make them 2 over 2.  I envisioned the tiny inhabitants throwing the windows open and bathing in the sea breeze!  Unfortunately, the plastic inserts suffered from the process (Crazy Glue + Plastic = Disaster) and now I’m pretty sure a quick glance out of a couple of them would make you think a damned serious fog had just rolled in from the ocean.  (Like that horror movie, aptly entitled The Fog.) Oh, well.  I guess that just adds to the ambience.

I will end here for now (although construction has gone far beyond this point now), having showcased my husband’s monumental contributions to my small vacation home.  Kudos – and Happy Father’s Day – to him!

The Renovation from HELL

I could pretend that a nor’easter of unprecedented fury bore down upon my little Cape Cod house and wrought tragic destruction upon it, and that would be a good story, but the truth is that I couldn’t bear to look at it the way it was any longer and decided to renovate.  Renovate is a nice, clean word that makes you feel all fresh and happy, but the process of renovation is a plunge into the nether regions of HELL.  And that trip ain’t for the faint of heart.

I dunno!  The dark colors of the rooms, and the kitchen flooring I finally came to despise, and the crazy-making $@&*%$!!! ugly black staircase with the railing and balusters that would NOT stick together all drove me to drink.  (OK, that’s a short trip, admittedly.) Plus, every blessed thing I tried to do for that house was soundly rebuffed.  I filled a bin with failed projects.  Finally, one day, sitting there staring at it with a thought bubble over my head in which I smashed it to bits with a ball peen hammer, it dawned on me.  This is a summer house!  What’s with all the dark colors?  What’s with the homely kitchen floor?  What’s with the kitchen unit that looks like no one uses it?  What’s with the ugly staircase the little people will obviously bust themselves up on when they grab the railing and it breaks off, sending them bum over teakettle to the ER?!

There was nothing for it but to renovate.  Make it fresh and clean and bright, like a summer day at the ocean.  With this new inspiration, I set to work! The staircase was pulled out and trashed and the fireplace was yanked out as well as I totally hated the style and color.  Kitchen unit and shelving was torn off the walls, which then required some patch work. The kitchen floor was peeled up and I took the glue off the floor with vinegar and warm water.

Next came removing the baseboards, door frames, window frames and windows.  When I installed the windows, I thought it was  good idea to put them in backwards so that there were little sills in the rooms instead of on the outside of the house.  What was I thinking?!  Beats me, but it meant that I now had to disassemble the windows, swap out the sashes so that the lower one was inside the room, and stick them all back together.  I used a blow dryer to loosen the glue, so the damage was minimal.  Reassembled them, and stuck them back in the way they were meant in the first place.  I had to use vinegar to get the glue unstuck on the baseboard and door and window frames, and had some damage to the floor where puddles of vinegar turned the wood black.  So had to sand and restain in spots.

Now that the house was bare, it was time to get the paint off the walls.  I thought, what the heck, I’ll use nail polish remover and just rub it off!  Nope.  Not unless I have nothing else to do 24/7 for the next 5 years.  So I started sanding it off.  Better results, but painful and time consuming.  So I took the house outside, pulled out my electric sander, and went at it.   By the time I was finished, my hands vibrated on their own for about a week.  BUT, the house was stripped down to bare MDF and plywood and ready to go!

I bought a Ceramcoat acrylic paint called Oyster White.  So apropos!  Went over the whole house with it using a foam brush to give it a “spackled” appearance which is much better than having brush strokes everywhere.  After three coats, I had the fresh, cool color  – or non-color – that I wanted.  Sigh of relief!

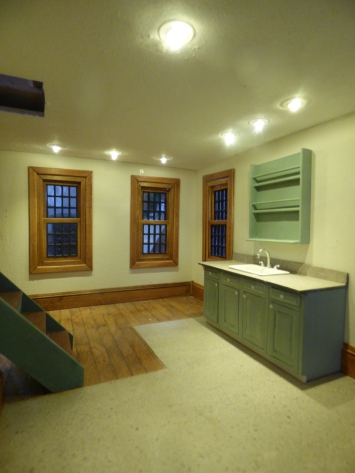
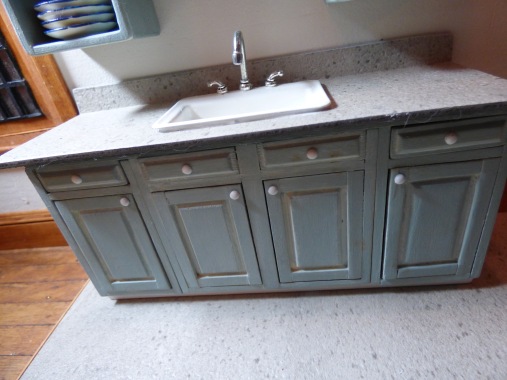
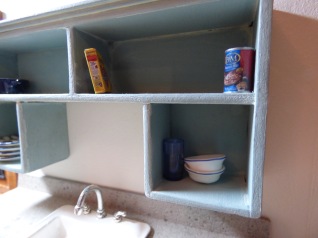
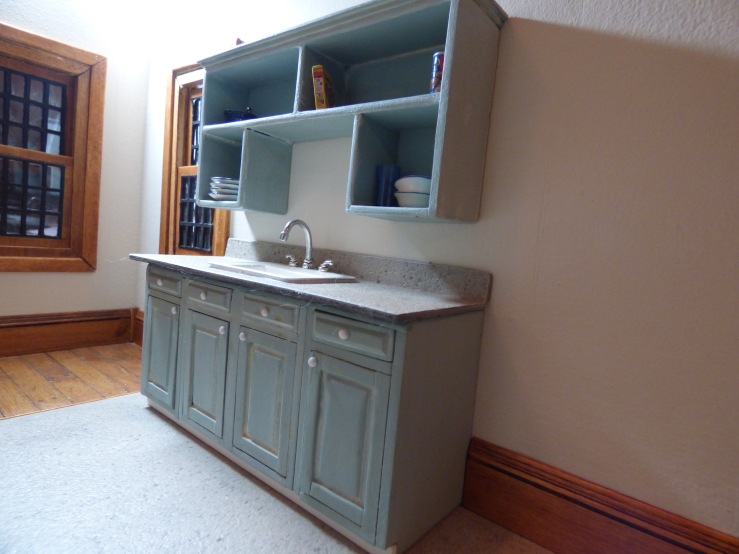
The kitchen was a huge challenge and stymied me for months!  I constructed 4 kitchen units, none of which satisfied me.  I even built cabinets using real life carpentry instructions and they came out great, but wouldn’t fit together smoothly. (Will work on that in next house.) Finally, I broke down and bought Houseworks cabinetry and assembled a small unit sufficient for a seasonal home.  p1000526

I wasn’t crazy about the fact that there are noticeable gaps in the doors and drawers.  I’m not sure that I would buy these again.  They turn out looking sort of…shabby…and not in a fashionable way.  And I couldn’t find a paint that I really liked, so defaulted to a chalk paint called Sage.  Not very nautical, but serviceable.  I covered the paint with some white wax and buffed it out, leaving white in crevices.  Added some knobs made with tiny white grommets and brads.  Do I like it?  No.  Am I going to quit while I’m ahead? You betcha.

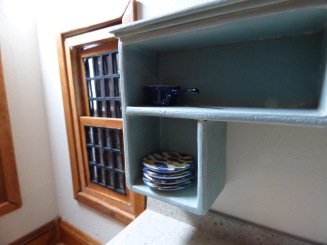
I used scrap wood to put the overhead shelves together.  For some reason, the Sage paint came out a slightly different color, probably due to a difference in the wood.  Also buffed this with white wax.  Stepped back and looked at it.  Grrrrrrr!

p1000514

p1000515

Again, I know when I’m whipped.  I figure once I put in dishes, and groceries and knick-knacks, the shelves won’t look quite as wretched as they do now. Right?  RIGHT?!

p1000512

The finished kitchen unit.  (At least until I get another wild idea to renovate.)

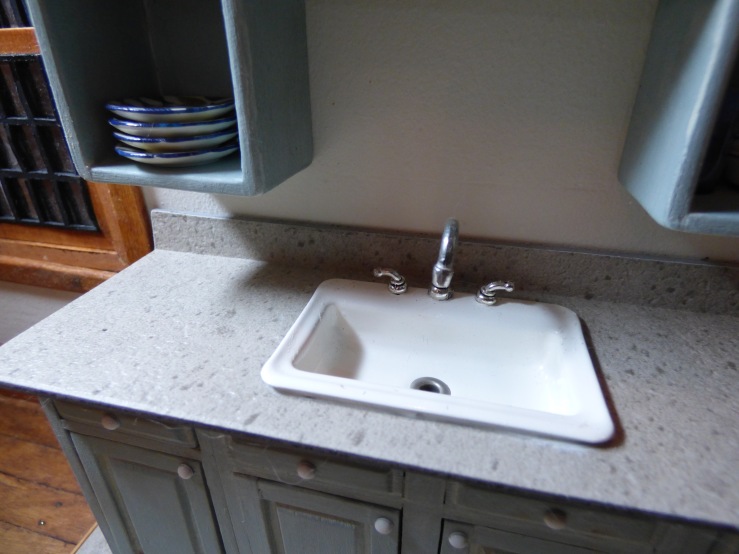
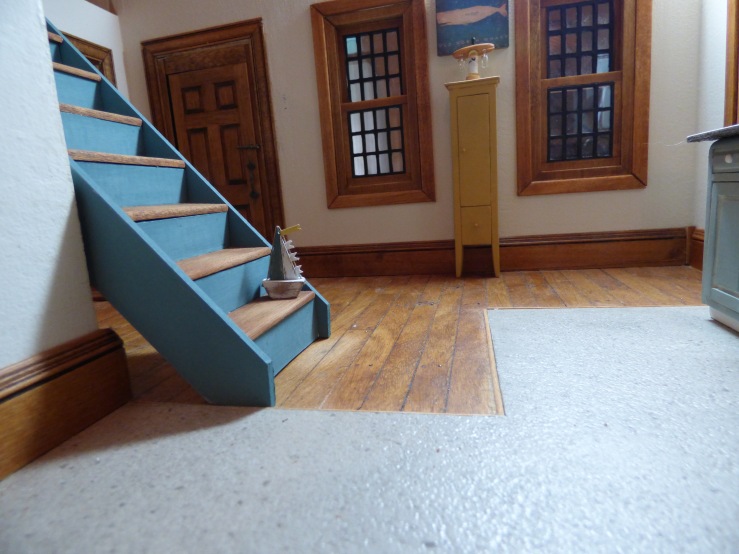
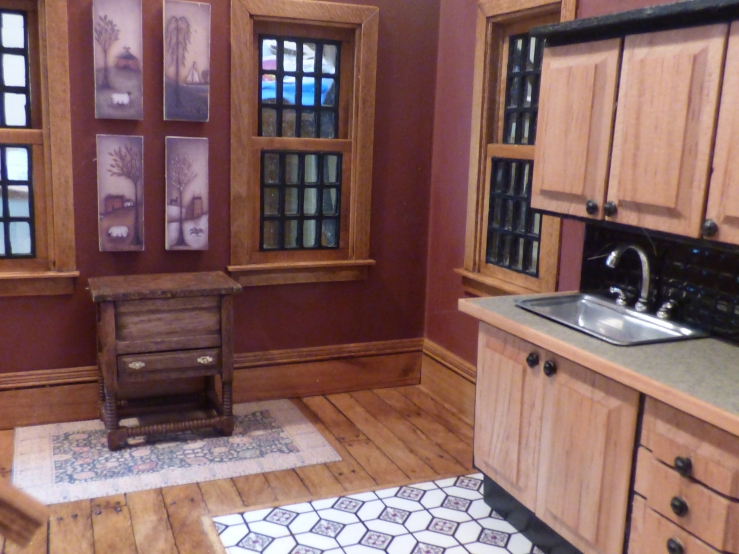
Next up: kitchen flooring.  The Sage paint made it difficult impossible to find anything complementary.  I went to Lowe’s and grabbed three vinyl tiles for RL houses and played around with them.  I decided on one that played nice with Sage, a sort of greenish-grayish-ocean-y color.  Slapped that down, and stuck down a new wooden border between it and the wooden floor of the entry hall before I had time to find fault with it.  Finding a countertop that would work with Sage and the flooring proved to be totally impossible absolutely maddening, so I just used more of the tile to make the countertop.  I know this isn’t “done” in real houses, but in the interest of remaining more or less sane, I think it’s a good compromise.

I still had the sink from the first unit, so I primed it and turned it from “stainless steel” to “porcelain” and added jewelry findings for the hardware.  And – how sad is this? – I actually put caulk around the edges of the sink so that there’s not an inexplicable gap between it and the counter. Just like in real life.  Ha!

p1000513

Pay no attention to the bunny fur!!!!

The last hurdle for the kitchen was the staircase.  I bought stringers and wood for risers and treads and assembled a new one.  It came out OK, but I couldn’t for the life of me get the balusters to stick!  I drilled and redrilled the sockets in the treads for them.  I used three different kinds of glues. No dice.  Adding the railing put me over the edge.  It wobbled back and forth on top of the wonky balusters and the whole thing looked like a poorly maintained bridge about to collapse.  I actually DID bust this up with a hammer, and felt like a new woman afterwards.

With renewed vigor, I cut out stringers from illustration board because it’s much easier than basswood to cut accurately with a craft knife.  (Because NO, I am not going to attempt to cut out stringers with the scroll saw my husband bought off a pal at his model train club. I’m really very attached to all my fingers, individually and as a group, and mean to keep in close contact with each and every one for the rest of my life.) I made the risers from illustration board, too. I had some mahogany strips lying around which my husband cut down to the correct width and I cut them to length for treads and glued them to the board staircase.  I painted it with chalk paint, Colonial Teal toned down with some Cottage White.  I’ll use some of the remaining mahogany strips to make newel posts and vertical railings – NO balusters!

p1000517Once I get the horizontal railings attached to posts on the staircase, there will be no casualties to ruin anyone’s summer!

Now I’ve had time to do some fun stuff.  And since Oscar Wilde said that initiation is the sincerest form of flattery, I decided to imitate some of the real life stuff that I thought would be perfect for my little house.

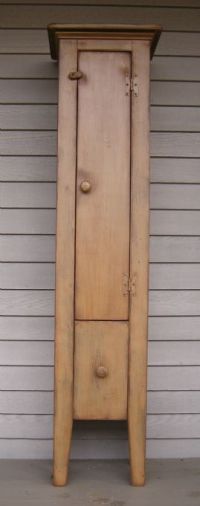
Like a jelly cupboard.  I love these tall, narrow cabinets.  I found a furniture maker on the internet that does cool Colonial style and rustic furniture, and this one caught my eye:

13ffa6126be5c4235317cf045ae48ec0

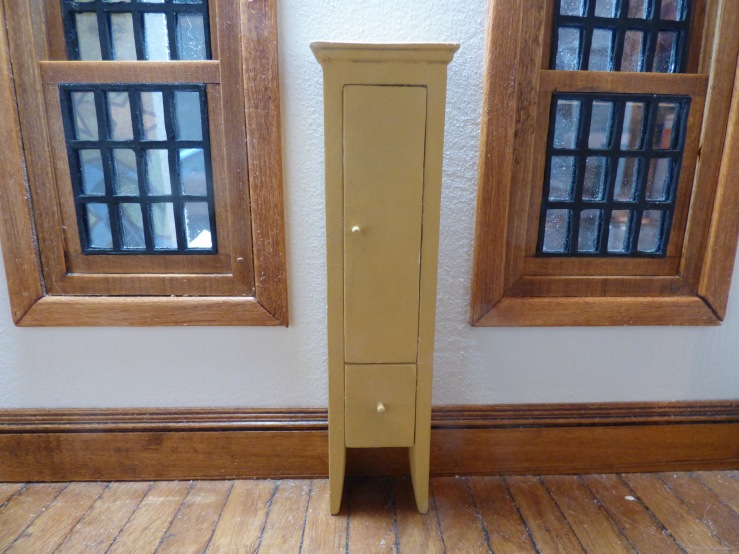
So I made this:

p1000493I left off the latch and the hinges because again, I know when to quit while I’m ahead!  I couldn’t get the finish I would have liked on plain old basswood, so found a chalk paint called Vintage Mustard. I’m loving chalk paints because they’re so soft and subtle.

I liked this RL bottle of wine with a thingie to hang the wineglasses from. (What the heck are those thingies called, anyway?! The pic says wine glass holder, but that doesn’t sound right to me!)

unknown

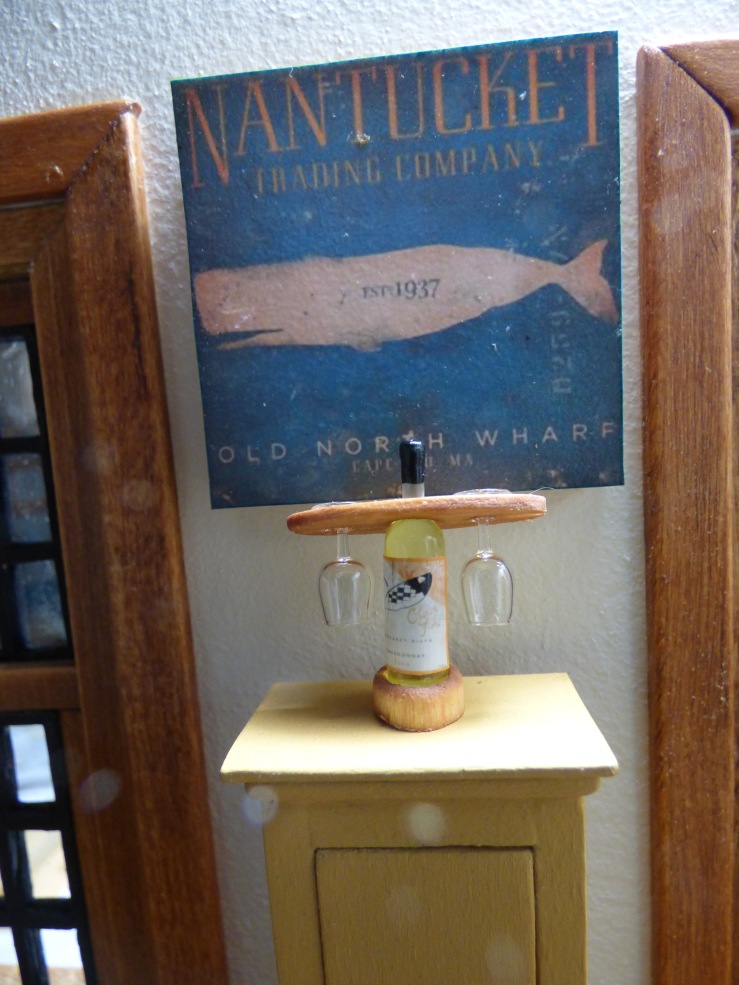
So I made this:

p1000510

I added a base for the bottle to sit in (and to disguise the fact that the bottle will fall over from the vibration of a gnat’s feet walking on a sponge in Australia).  And honestly?  The hole for the bottle is a tiny bit too big, making the thingie slide around kind of fast and loose.  I gotta fix that.  I got the label for the bottle on the internet – it’s from a wine called Clown Fish.  Well, why not?  The little fish complements the whale on the picture I put together using a pic I found on Google somewhere and some strip wood for a frame that brings it out from the wall. I find I much prefer frameless pictures for the walls.  (Again, please excuse the bunny fur – it’s been a blockbuster shedding season this summer!)

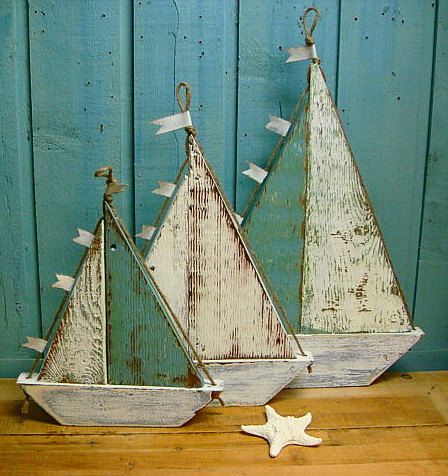
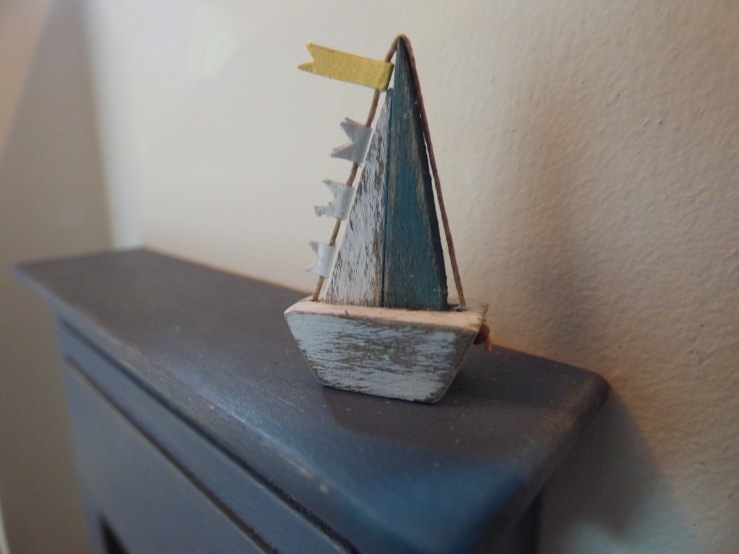
And I loved these little wooden sailboats I found on a shopping site for beach house decor!

5a2a43c97b9516024b8a1e67e2cf614b

But I only did one for my house:

p1000498I might complete the set once the circulation in my cramped hands returns to normal after constructing this one. I used scrap wood and just sanded the bits until they took on the shapes I wanted.  I added a little yellow flag just to be a showoff!   Now that I see these together, mine is taller and skinnier than the real ones.  Darn!!!  I may go back to the drawing board on this one.  And let me tell you, threading the “rope” through the microscopic holes in the boat and then trying to knot it is one of the best times you’ll ever have.  If you’re a masochist.

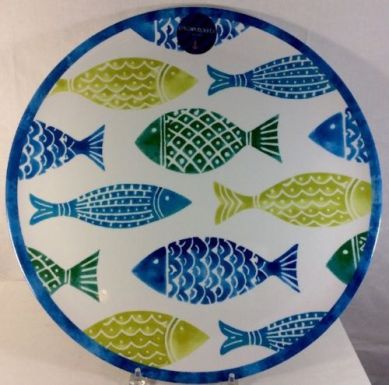
The most fun was imitating these fish dishes I found on the internet!

cynthia-rowley-fish-melamine-round-serving-tray-platter-picnic-beach-marine-24f622b7f4f8fe60b4bde0b9fd79aa48

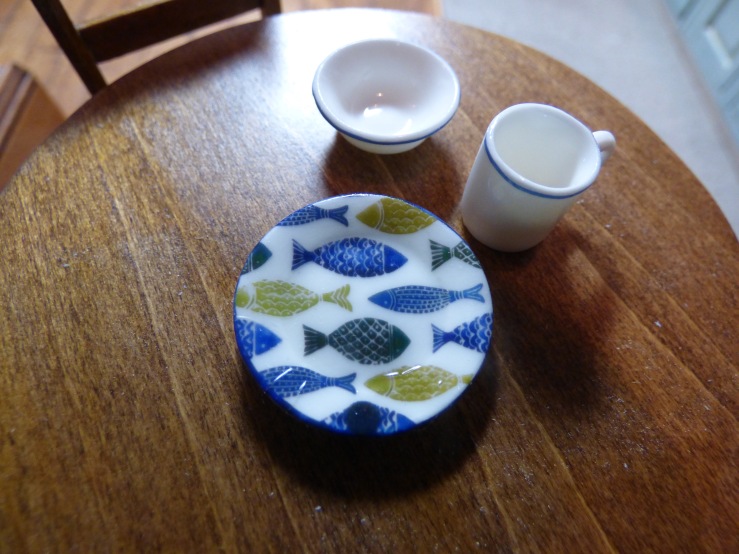
I’d love to have these in real life!  But in the meantime, I made these:

p1000496

I bought some plain white porcelain plates, bowls and mugs.  Using waterslide decals, I transferred the fish plate images to my tiny plates.  I LOVE doing waterslide decals!  I could make plates with them from now ’til doomsday!  Unfortunately, the photo included a big blue store sticker on the plate which you can see on my plate as a great big blue BLOB!  Grrrrr!  I was going to imitate the bowls as well, but of course, a round waterslide tucked into a bowl shape equals a wrinkly mess, so I made do with putting a blue stripe around the bowls and around the mugs as well.

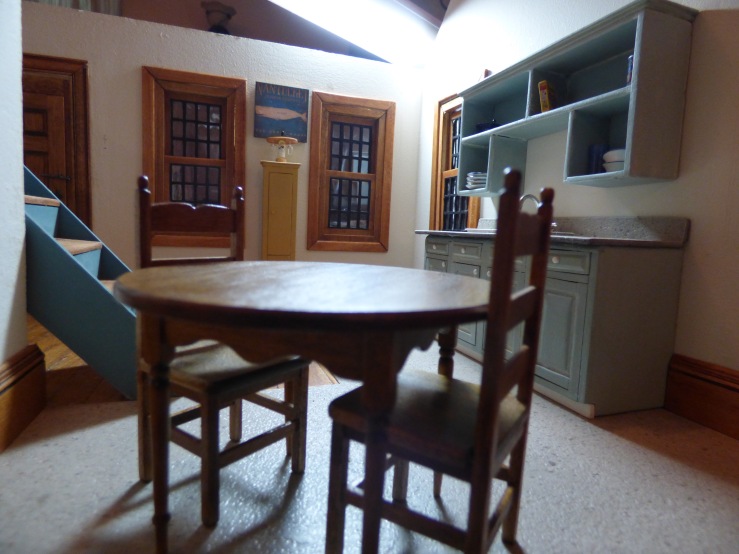
Whew!  That’s it for the kitchen!

p1000523

p1000521

I just now need to fill the cabinets, put appliances on the counters, get a mini-fridge to go next to the kitchen unit (along with a trash bin), and add some more wall art and other little things that will make it look like a room that people really live in.  And spill stuff in.

Next time I’ll share the living room renovation, which wasn’t nearly as miserable!

Wicked Little Things

First things first!  I’m totally THRILLED that I earned an Honorable Mention in the Undersized Urbanite competition!!!  All the entries were fantastic and I thoroughly enjoyed entering so many mini worlds once the heat was off and I didn’t have to worry about being demoralized by the great work everyone was doing.  I had THE best time participating in the competition and the HM was the icing on the cake.  Thank you to everyone who voted for me!

Now it’s back to business!

The Urban Dictionary defines the word wicked as “New England slang that adds emphasis” similar to very; really; extremely.

Having undergone a CMC arthroplasty on March 3 – removal of the trapezium bone in my thumb – I’ve been sidelined for lo these many weeks from construction on the Cape Cod.  First 2 weeks in a cast and now finishing up my second week in a splint which immobilizes my poor widdle trapezium-less thumb.  Total recovery is about 3 months.  I’ve read my Kindle dry, I  can’t surf one more Hulu wave and was feeling totally crazed watching the house sink into a derelict shack, set upon by wind and rain, its roof sagging forlornly. Metaphorically speaking, as it actually has no roof and the weather right next to the pellet stove tends to be balmy, bordering on tropical.  But you know what I mean.

So, for the last couple of weeks out of the cast, I’ve been working on VERY little things.  Wicked little.  Maybe I can’t put in lighting or reconstruct the kitchen unit that I have – surprise! – torn out already, but I can do little projects here and there just to keep a hand in.  And I mean a hand.  Luckily, the recuperating thumb is on my left hand.  I’ve pressed the fingers into service to hold onto bits and pieces securely enough for me to work on them with my right.  But first, here’s the last projects I finished just before I went under the knife:

P1000392

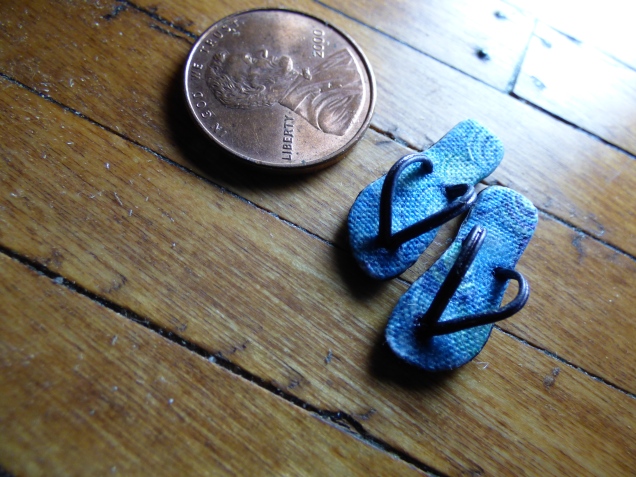
When you live in a house near the ocean, you need your favorite flip flops for hitting the beach, right?

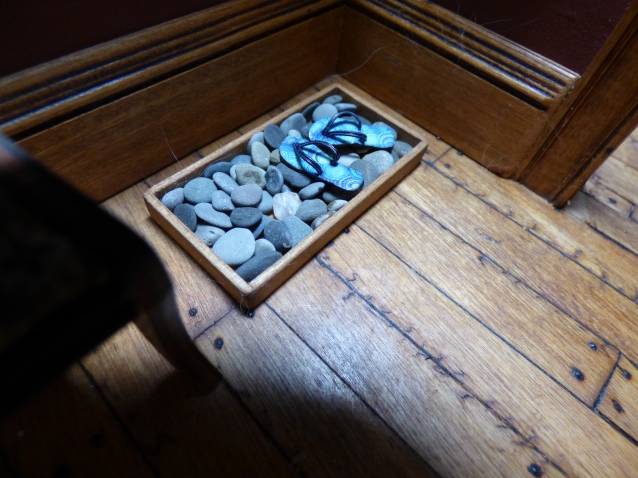
P1000385

You can just kick them off into the boot tray inside the front door and let the stones soak up the sand and salt water.  No muss, no fuss!

I attempted to follow the pictorial tutorial done by Monica at Fabulously Small, but she lost me early on!  So I improvised.  I did use her printie of the flip-flop as a template for mine, with a couple of layers of black poster board for the soles and heels.  I found the fabric pattern on Fabrics.com and squished it down to size, printing it on plain white fabric using freezer paper.  The straps were just narrow white wire that glued into holes in the soles and colored blue with a permanent marker.

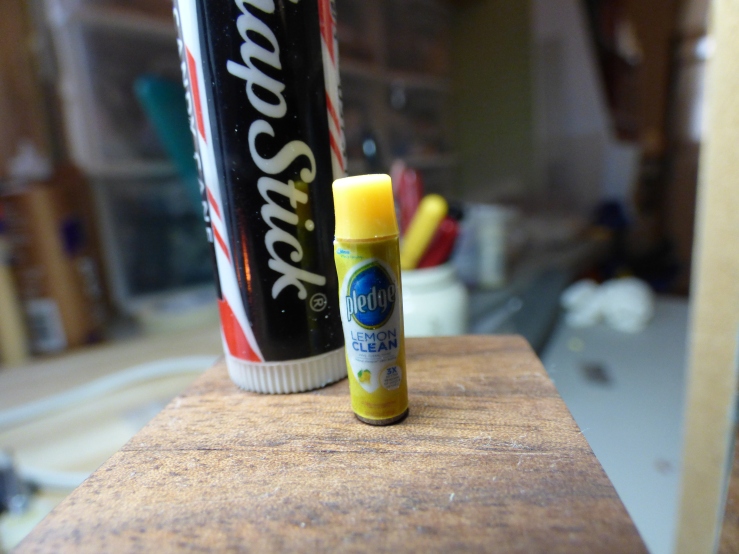
I also scrapped the end tables in the living room and made new ones to match the coffee table using walnut strips, which I then oiled until they were nice and dark.  And to keep them dust free I needed a little can of Pledge:

P1000442

How sad is this?  I stripped a RL can of pledge of its label, scanned it, printed it on photo paper and glued it to a piece of wooden dowel as close to 1:12 scale as possible.  The I cannibalized the top from a felt tip pen for the cap.  I had so much fun I stripped lots of other containers in the house and now the all have their contents labeled on bare metal with a Magic Marker so I don’t go spraying the furniture with Scrubbing Bubbles.

So, after my surgery, I started back in with small projects!

P1000377

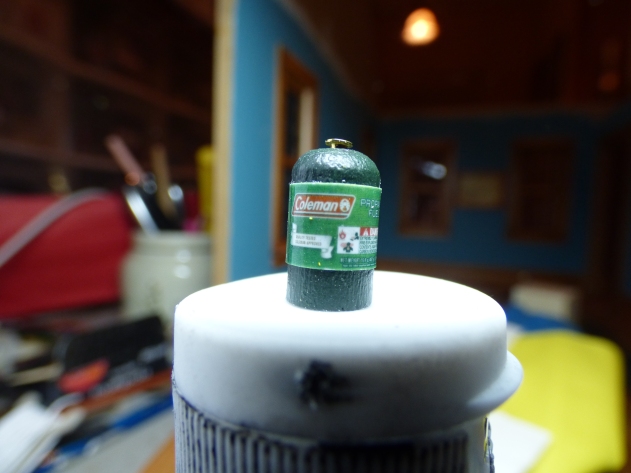
Like some propane cylinders for the emergency lantern if the house loses power in a (perfect) storm.  More stripping and scanning – I love it!

P1000438

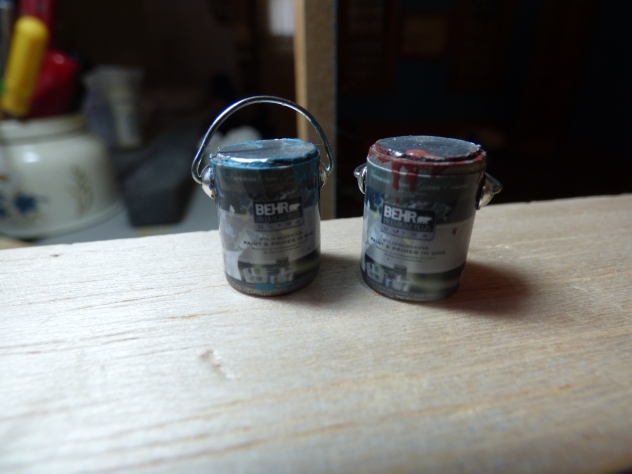
Paint cans for storage in the utility room. Yes, naked paint cans in my basement.

P1000449P1000451P1000452

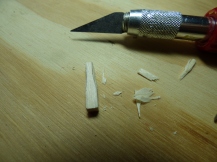
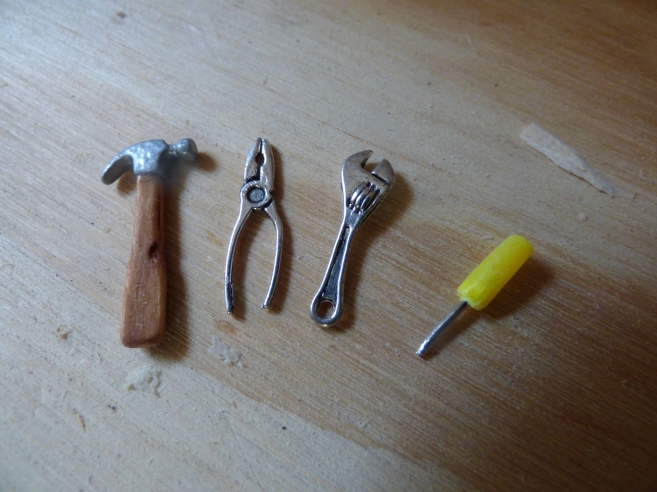
I found this hammer charm, along with pliers and some sort of wrench, at A C Moore. The hammer was a funny bronze color, the handle was metal and of course there’s that big old loop on it for dangling from a bracelet, so I chopped the hammer’s head off and spray painted it silver, then whittled out a proper wooden handle.

P1000457

I had to bust the pliers to make them CLOSE as they look ridiculous gaping open, and just crazy glued it back together.  Looks a bit wonky, but the lady of the house is no great shakes with tools and has dropped the pliers about a hundred times, and that’s my story. The screwdriver was made from a yellow push pin.   During production, the rabbits called the cops to complain about the noise the belt sander was making (something like a gigantic tractor-trailer squeezing through a tunnel about 2 times too small for it), as well as the distinctive odor of melting plastic.

P1000456

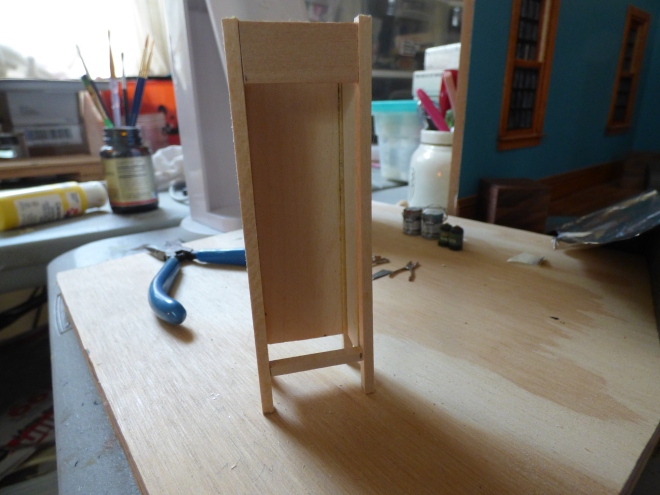
But I really wanted to make some furniture!  I had planned on a tall, narrow cabinet for the kitchen and found a artisan signed jelly cabinet with a sort of “folk art” painting on the door on Ebay that had sold for $70.  Too rich for my blood. But Ebay very helpfully showed all sides of the cabinet, so I was able to see that I could replicate it pretty easily to my own dimensions.  This was my first effort, which served mostly to show me where I was going wrong.

P1000458

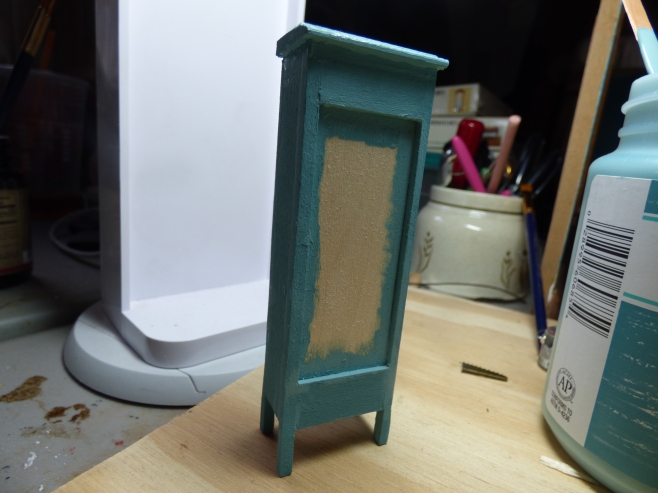
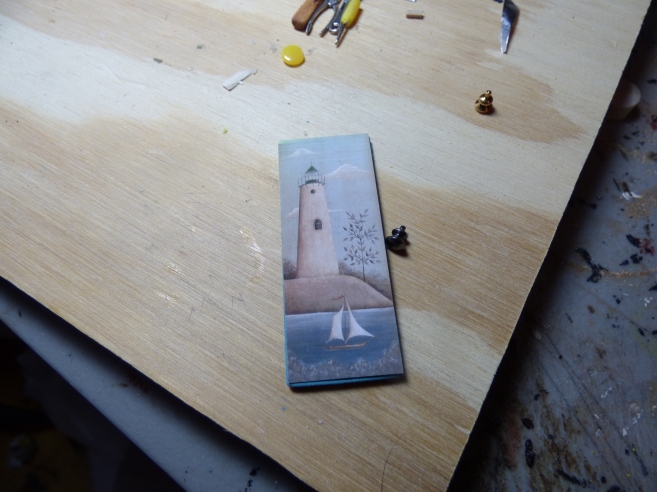
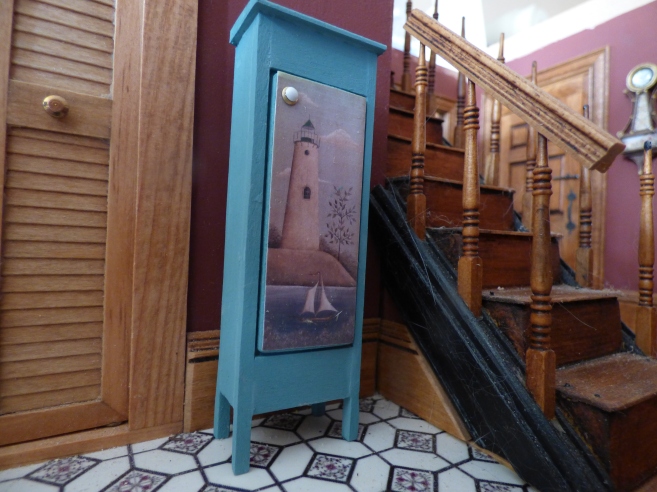
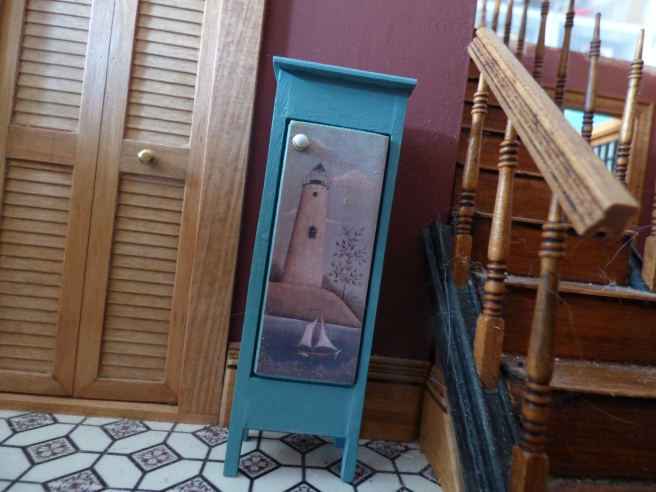
My second effort was better.  The Ebay cabinet boasted an opening door and shelving.  I dug out some tiny hinges from my stash and after careful contemplation, decided that I could save myself a great deal of agony if I used a false door.  Which means no shelves (ergo, no jelly, but I prefer marmalade anyway).  And no bottom (which would have had to be notched to fit around the legs and that just wasn’t happening).  I painted it with Waverly chalk paint in a nice blue called Agave that I snagged at the craft store just cause it was pretty. Next, I needed a “folk art” painting for the door.

P1000459

The pictures in my kitchen are by Donna from the folkartbydonna Etsy shop.  I asked her if I could copy some of the photos in her shop and shrink them down for my dollhouse.  She was happy to give me permission.  I chose this one for the cupboard door.

P1000465

Here’s the cupboard in the kitchen.  Please excuse the mess!  Kitchen renovation is a nightmare! And no, I still haven’t finished the staircase.  The balusters and rail keep falling off.

P1000466

Good heavens!  Look at all the bunny fur EVERYWHERE!
P1000412

This is Sebastian, the spoiled brat who has to be with me at ALL TIMES and it’s his fur that litters the Cape Cod house.  He is obviously unapologetic. (And yes, he has eyes, and they’re the sweetest hazel color ever!)

Slowly, but surely, I’m getting back up to speed.  There’s so much work to be done!

My Personal Best

OK.  The UU competition is drawing to a close and I’ve managed to semi-finish two rooms of a four room house.  I guess you’d say that’s my personal best!  And I stand by it!

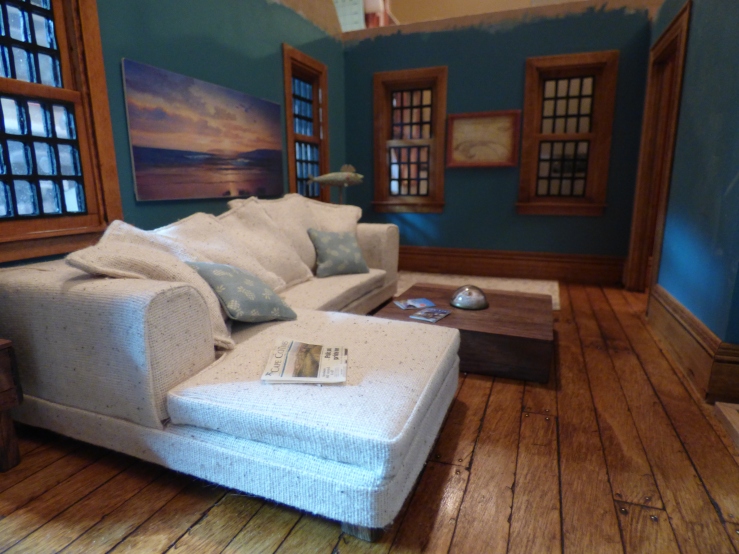
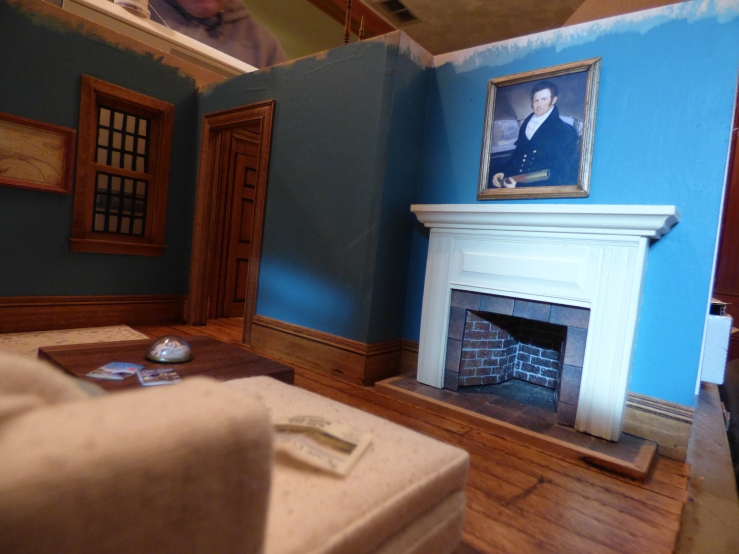
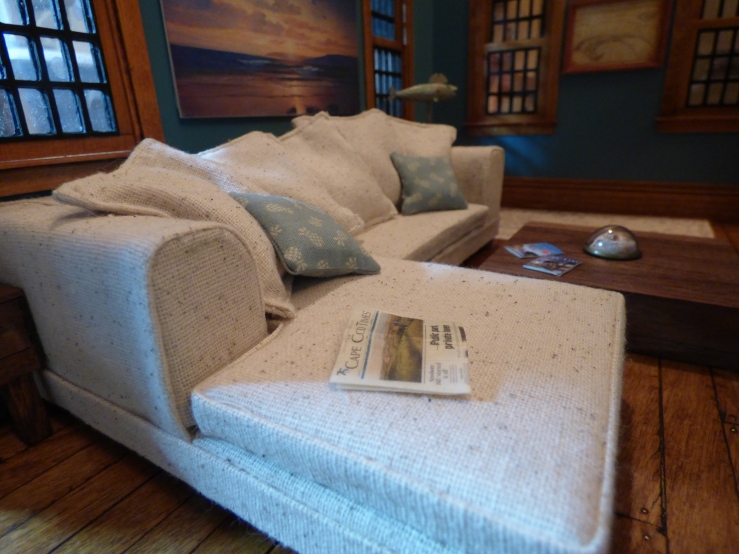
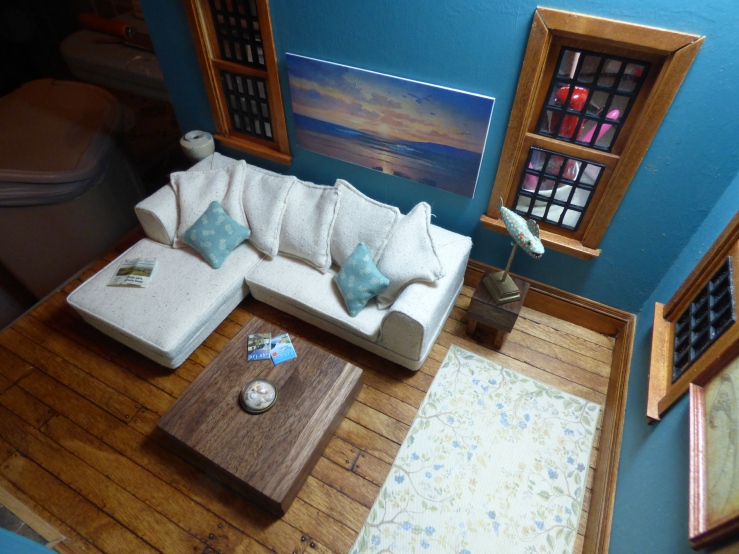
Not much commentary this time.  You know what they say, one picture is worth a thousand words.  And frankly, I’m beat.  I just wanted to finish up the living room of the Cape Cod house, and I mostly did.  There’s still tons of “little things” left to do in the utility room, the kitchen and the living room.  Books.  Dishes.  Lamps (and the entire lighting system).  Plants.  All those little things that make a house a real home.  Not to mention the wall mounted flat screen TV I’m going to hoist up so the fish decoy can watch Hulu all day.  Otherwise, he gets bored and then all bets are off.  He’s been known to trash the house in a fit of boredom.
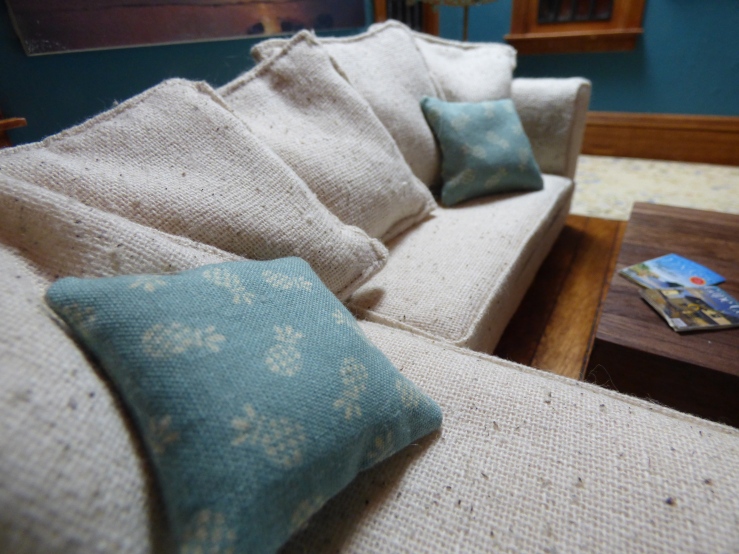
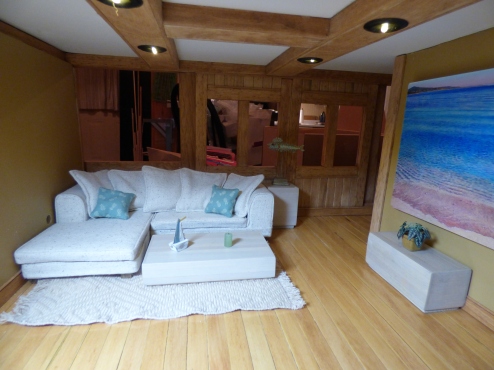
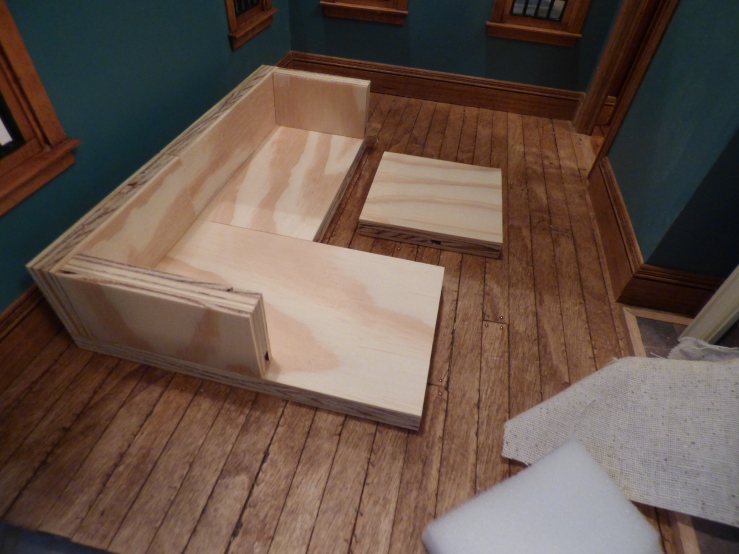
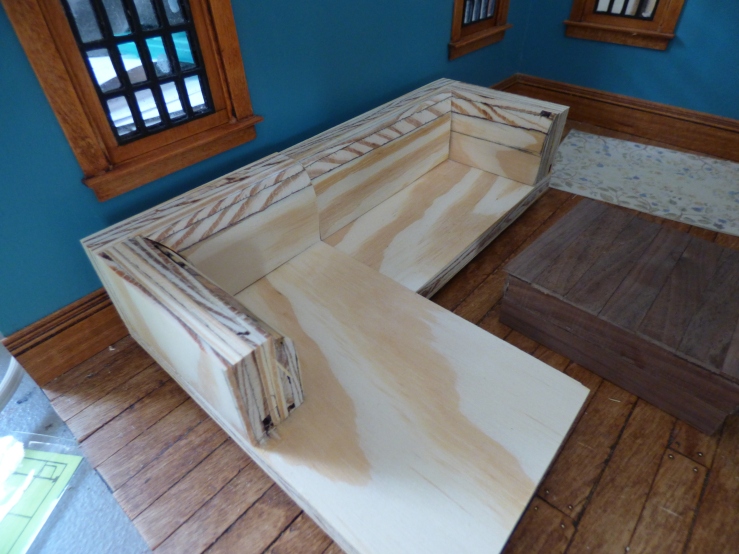
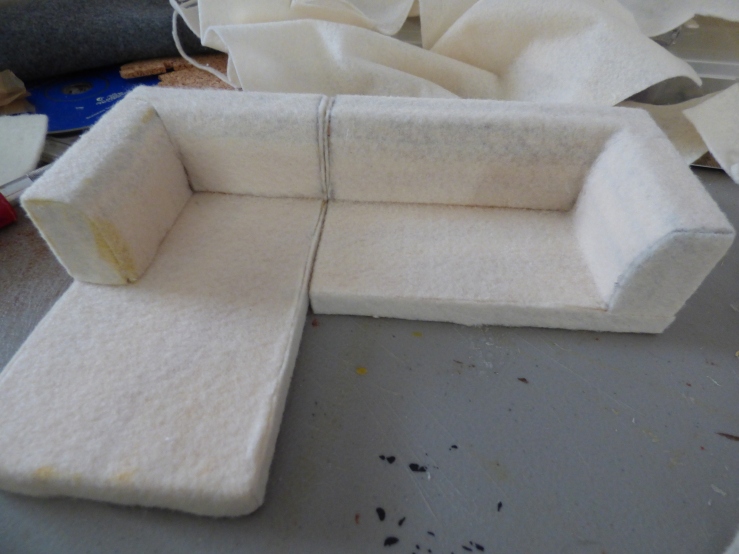
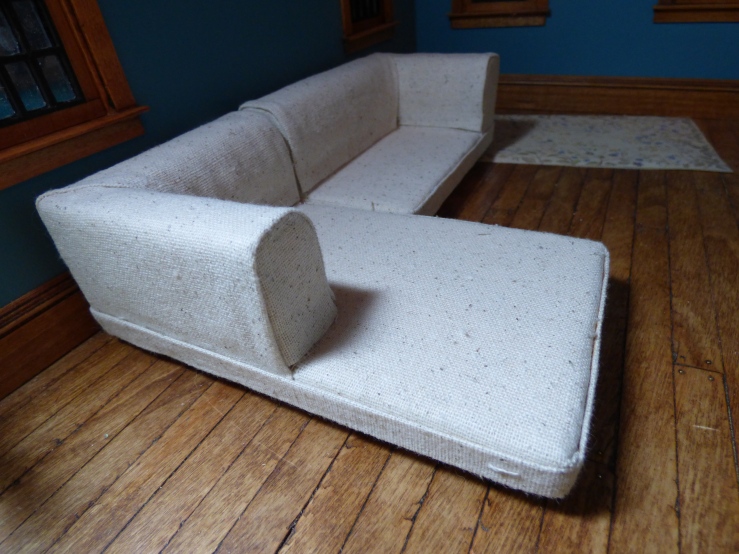
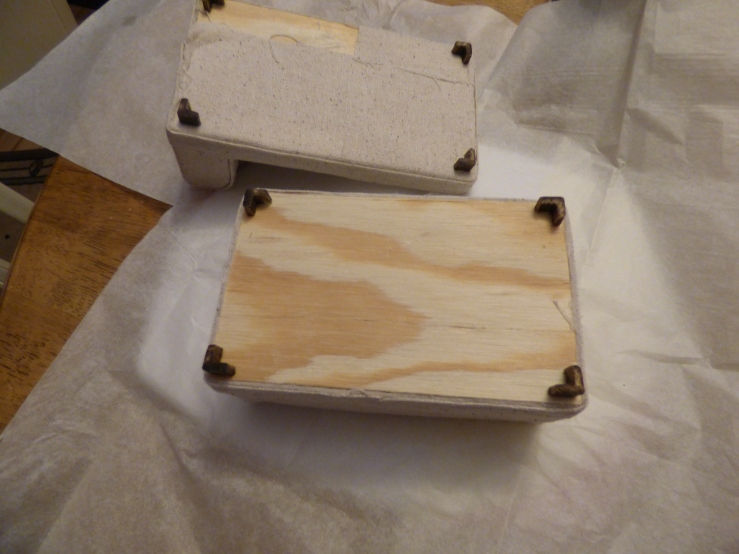
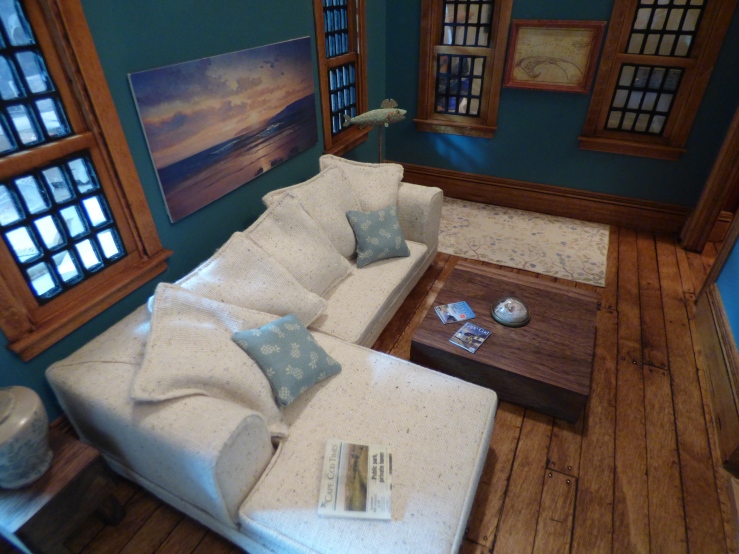
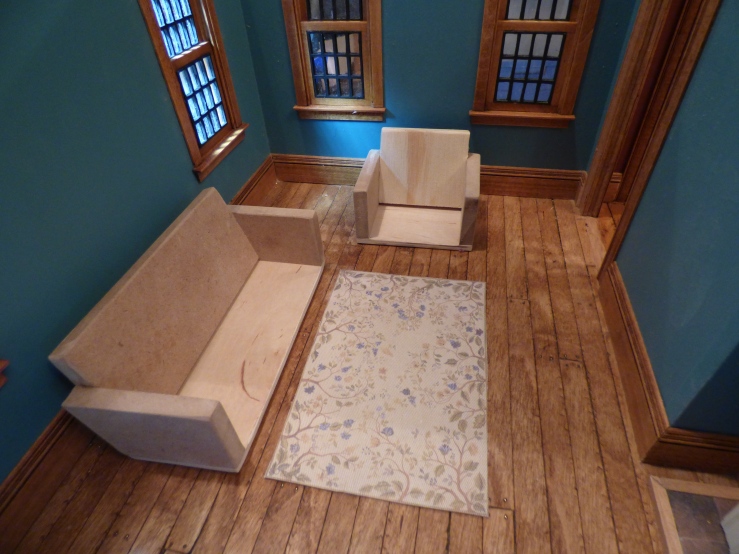
I know I said that my sofa and chair were going to be made from a Mitchymoo tutorial.  BUT.  I had had my heart set on this gorgeous sectional on Josje’s A Beautiful World site.  And she has a short tutorial on how she made it.  I took one look at it and thought, “Ummmm…..NO! No way, no how, major bad mojo for me to get into this!”  The Mitchymoo sofa looked so much easier and was lovely in its own right.  But, like an itch you can’t reach to scratch, that sectional preyed on my mind.  I wanted it, and I wanted it bad.  Finally, I broke down and went for it.  I used some of the bits from the Mitchymoo tutorial to work around the fiddly parts that stymied me (fusible bond is awesome!!!!), and it didn’t turn out quite like Josje’s, but what the heck!  I actually finished it instead of tossing it my own personal scrap heap, and I’m proud of that.

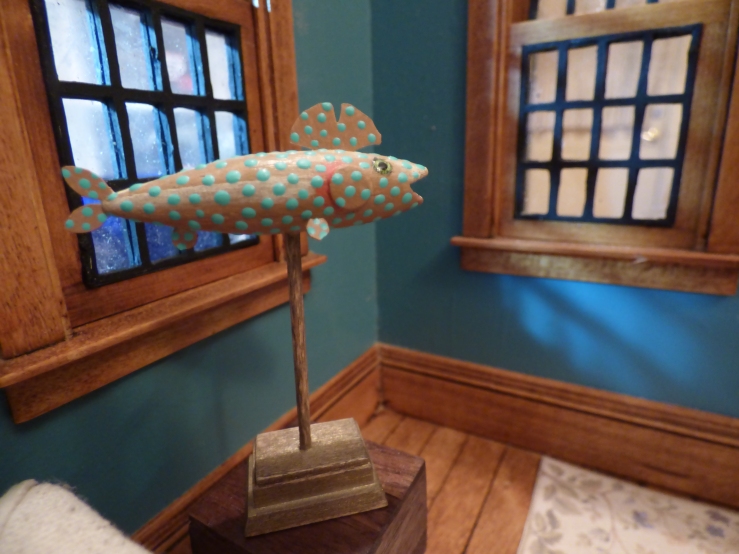
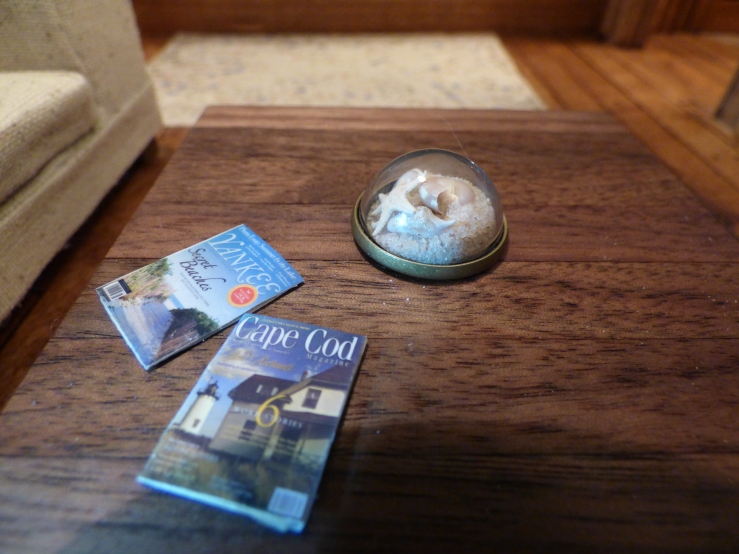
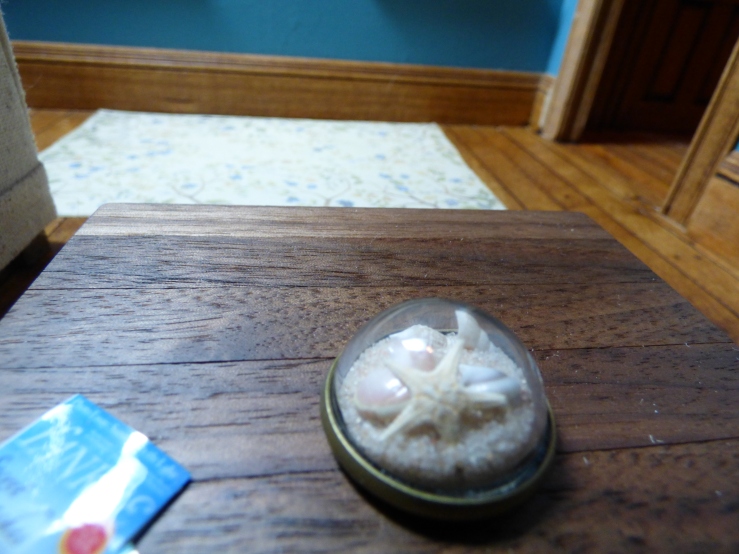
I added a low, square coffee table (I would have one in RL about 6′ x 6′, I LOVE those things!)- a pine square covered in walnut flooring strips, sanded and gussied up with some tung oil.  I’ll wax it when it’s dry.  The end tables are also bits of pine with walnut – the legs are temporary.  They didn’t come out the way I had envisioned, but they do the trick for now.   The beach “terrarium” on the table is from GoFloat on Etsy – it’s sold as a ring and I asked if I could the bubble without the ring part.  I love it!  The fish is a miniature “antique decoy” from barbplevan, also on Etsy.  It’s got the cutest little teeth!  I couldn’t get a good shot of them, but take my word for it, it has a delightful fishy grin.  And the lovely teal pineapple cushions on the sofa were made by none other than Brae Oktober – I got them from her Otterine shop.  Pineapples are a traditional colonial American symbol for hospitality and when I saw these cushions – HAD to have them!

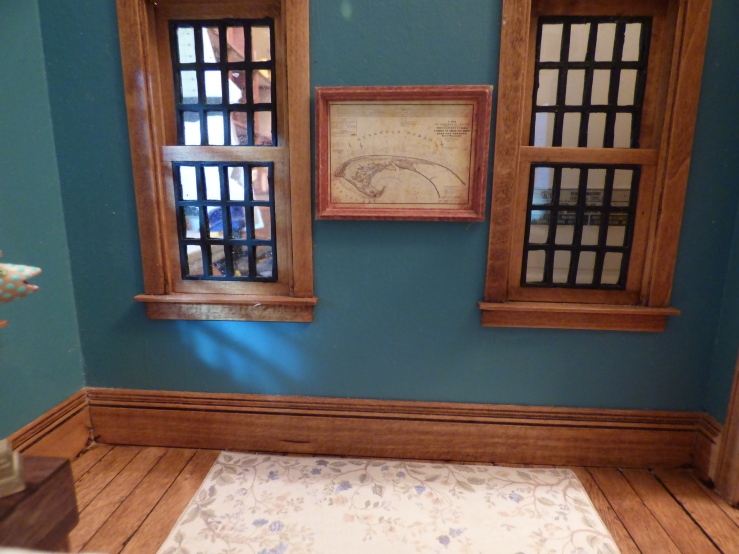
I made the framed map of Cape Cod, the little magazines and the newspaper with my own delicate little hands. Which are now merely cramped claws after this marathon miniaturing session. Hah!

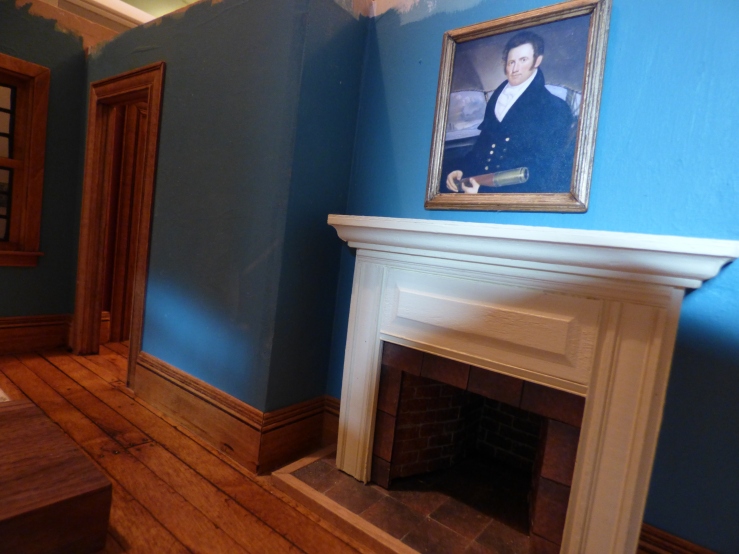
Without further ado, here are some construction pics and my (semi) finished living room:

P1000325

P1000326

P1000327

P1000328

P1000333

P1000334

P1000335

P1000337

P1000340

P1000342

P1000351

P1000357

P1000344

P1000345

P1000343

So much more to do!


Kitchen Nightmares

If you think you’d heard bad language on Ramsay’s Kitchen Nightmares, all that bleeping is NOTHING compared to what my dear husband had to endure as I struggled to finish the Cape Cod dollhouse kitchen.  I think he snuck out to CVS and bought some ear plugs. I had a love/hate relationship with that room.  I hated it and it loved to make me hate it!

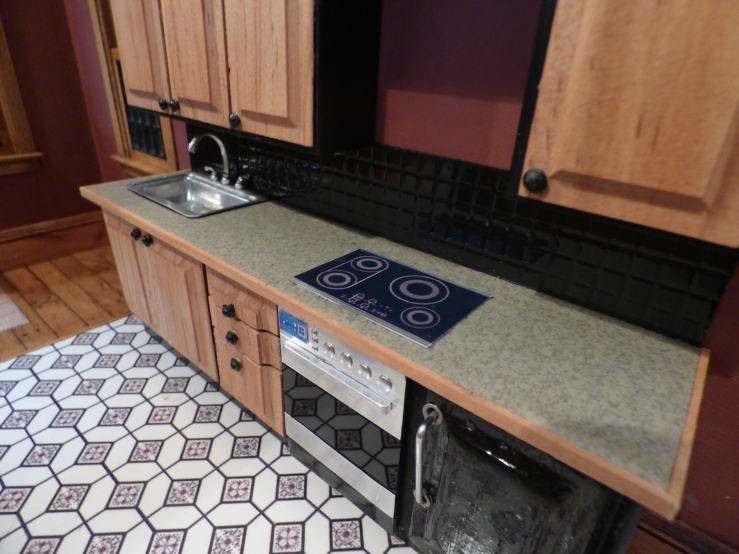
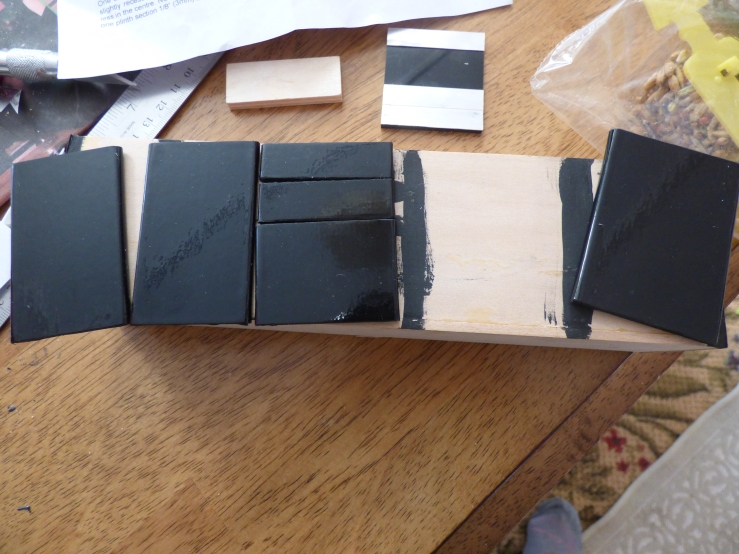
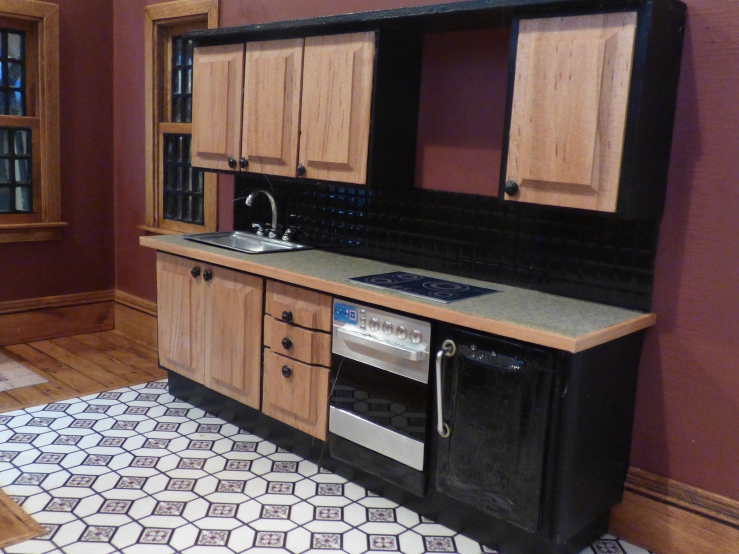
I thought I was being clever by buying a compact kitchen kit from ELF Miniatures in the UK.  It’s a long countertop with sink, stove/oven, refrigerator and cabinets.  Perfect for a small house.  P1000228

I chose a sleek, black little number and figured I’d have it done in a snap.

P1000225

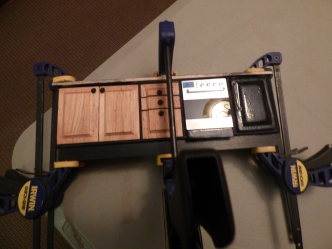
Now, I might have done if I was a more accomplished person and had a clean room in my house.  As neither of those things were in place, I had a fight on my hands.  The entire kitchen is meant to be covered in black “film” – something like very thin, glossy contact paper.  And it looks great — until you odd little blotches from paint or flying debris or whatever — and then you have a kitchen unit that looks like it’s been spray painted by vandals and hastily covered over again.  So I ripped all the film off.

P1000267

Not yet defeated, I sanded it down, and painted it black.  The flat finish wasn’t what I was looking for.  Sanded it again and stained it with Mixwax Jacobean, which is fairly dark.  It looked sooty and charred, as if my little householder had dragged it off a fire pit at the dump.  It was too depressing to even bother taking a pic.

I briefly contemplated smashing it to bits with a hammer, but talked myself down.  Instead, I ripped off the doors and drawers, covered the whole mess with illustration board and waded in again.

P1000268

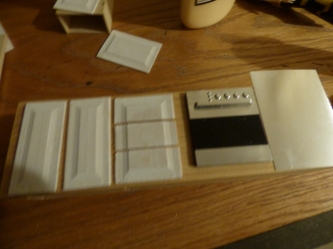
I rummaged though my increasingly eclectic stash of odds and ends.  Found some “wainscoting” that looked like cupboard doors.  I stained them and cut one up to make three drawers.  Made knobs from black eyelets with a tiny black brad tucked in to fill the hole in the eyelet and attached them.

P1000253P1000274

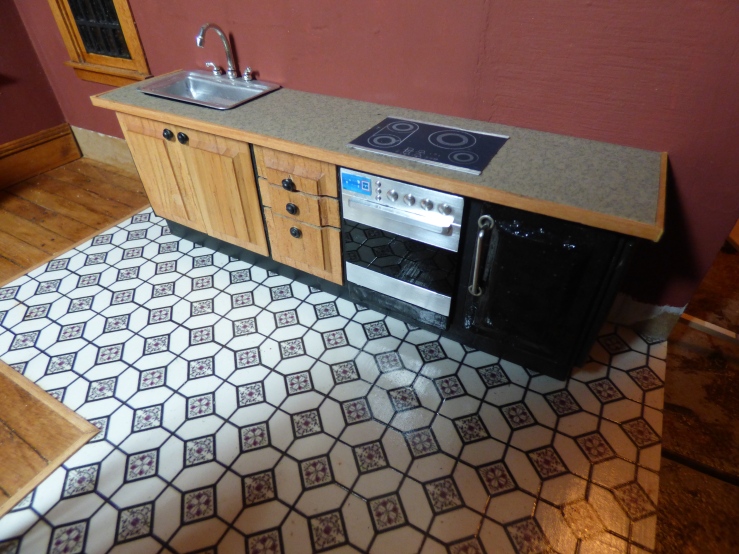
I salvaged the stove front and replaced its “clock” from the kit with something I found on Google images.  I had accidentally destroyed the kit stove top because I thought it had an adhesive back and only realized it didn’t when the whole thing ripped.  Again, Google images provided what I thought was a nicer stove top which I printed on photo paper and added a couple of rows of silver pin striping tape, then glued it down to the counter.  The “film” I had chosen for the counter top looked far better on my monitor than in real life.  So I got some contact paper and used that for the countertop.

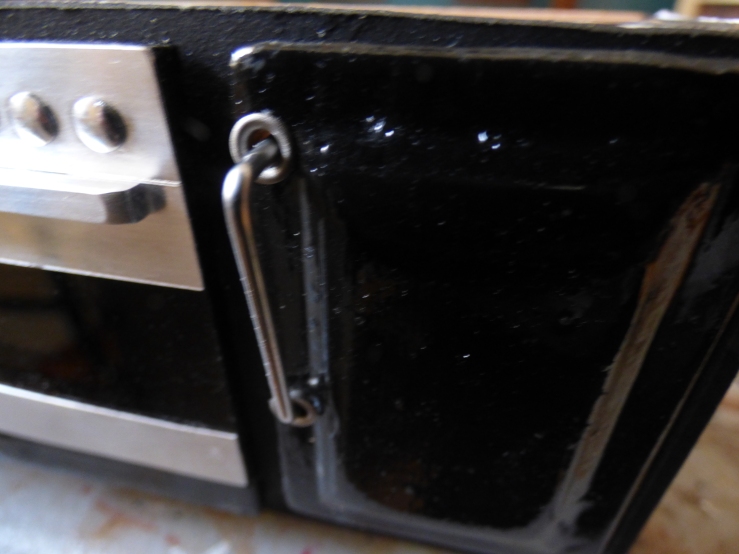
I used another piece of wainscoting for the refrigerator door.  I painted it black and then dipped it in Triple Thick Glaze to try for that glossy fridge door look.  Almost made it, but Triple Thick and I don’t get along and it has glaring BUBBLES in the finish that irk me every time I see them.

P1000273
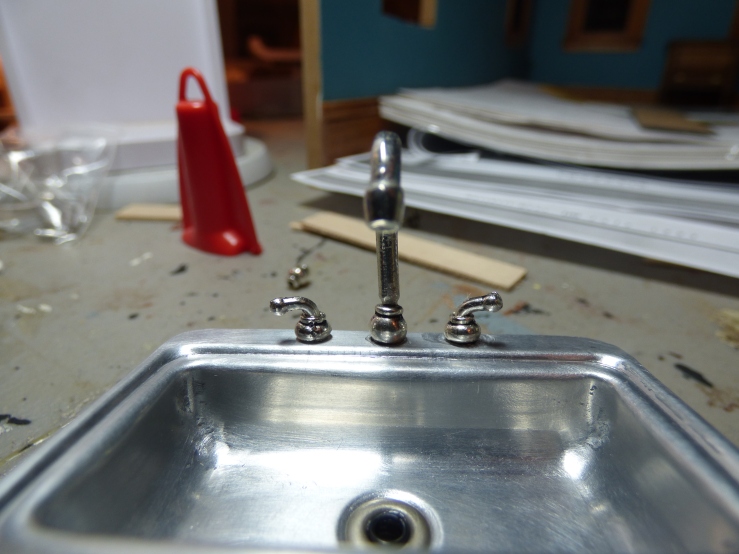
One day, that fridge door will by pried off and replaced! I simply can’t stand thinking about those ghastly bubbles.  I punched a hole in the sink and installed a drain – how can you have a sink with no drain?!  I kept the kit faucet, but the handles were indistinct blobs of metal, so trashed them and made handles from jewelry findings. By the time all this was done, I was beat.

P1000250

What did I learn?  The shortest distance between two points isn’t necessarily a straight line when on that line there are great big holes filled with tar that you keep falling into and wallowing around in for days at a time.  Next time, I’ll just make the whole unit from scratch.  I think ELF Miniature kits come out beautifully –when somebody else assembles them!

P1000279

My ELF Miniatures kit bash!

I had also bought the upper cabinet kit, but by the time I got to it, I had wised up and simply fitted it out to match what I’d done with the compact kitchen.

P1000261

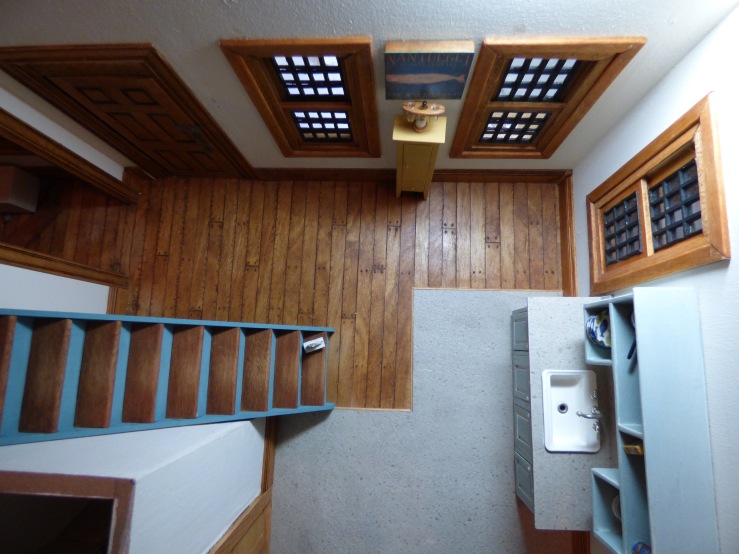
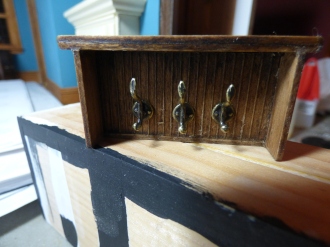
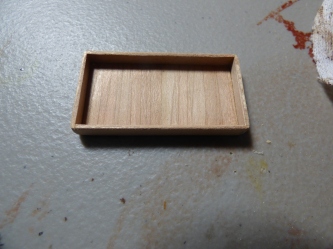
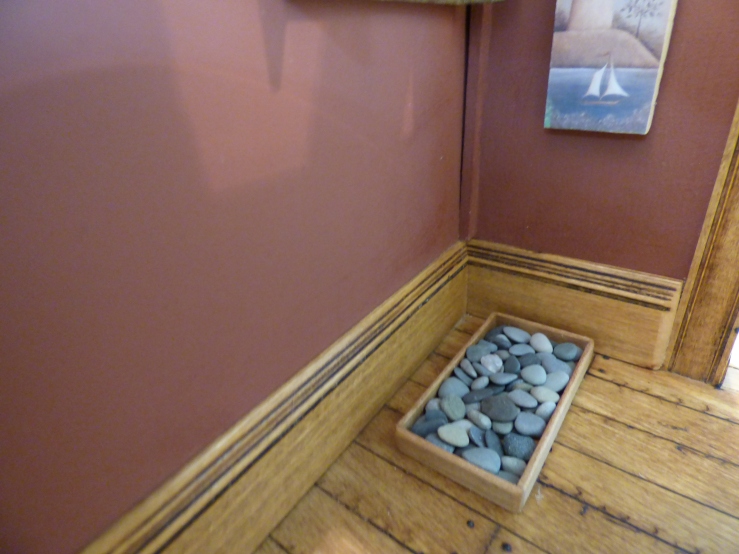
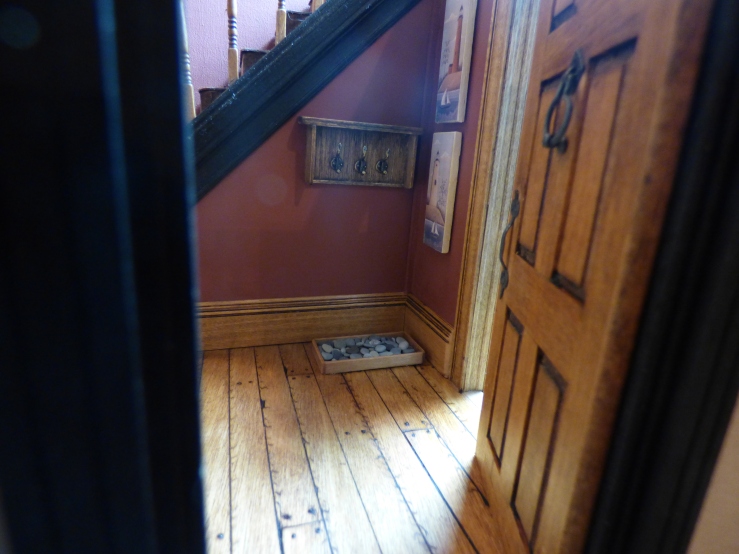
While I was wallowing in those tar pits, I managed to put together a coat rack and a boot tray which will be filled with rocks (I saw these on the internet and LOVED them – what better place to kick off your wet, sandy flip flops or walking boots?!).

P1000257P1000281

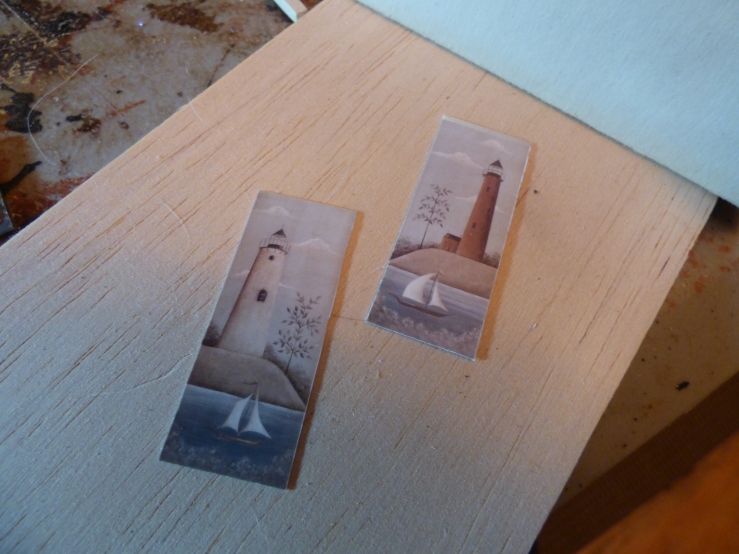
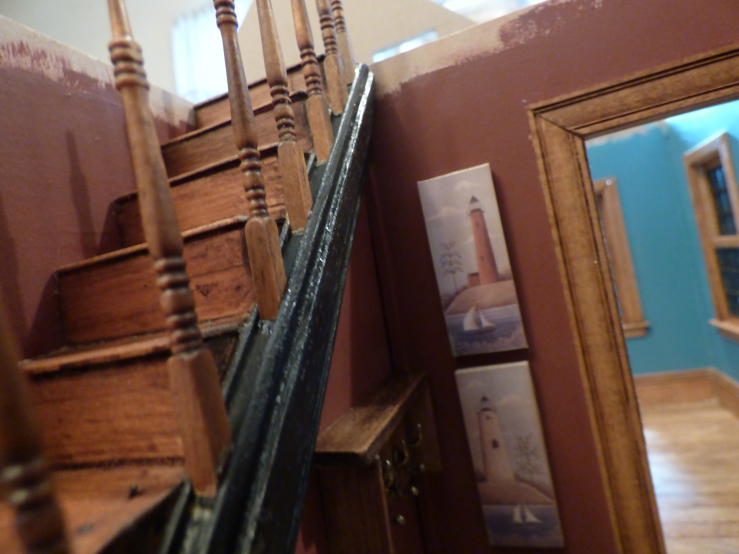
I also made some pictures for this room.  The pictures were downloaded, printed on photo paper, Mod Podged to take the gloss off and glued to balsa wood.  I found some really neat velcro stickies for posters, cut them into bits and used them to “hang” the pictures.

P1000282

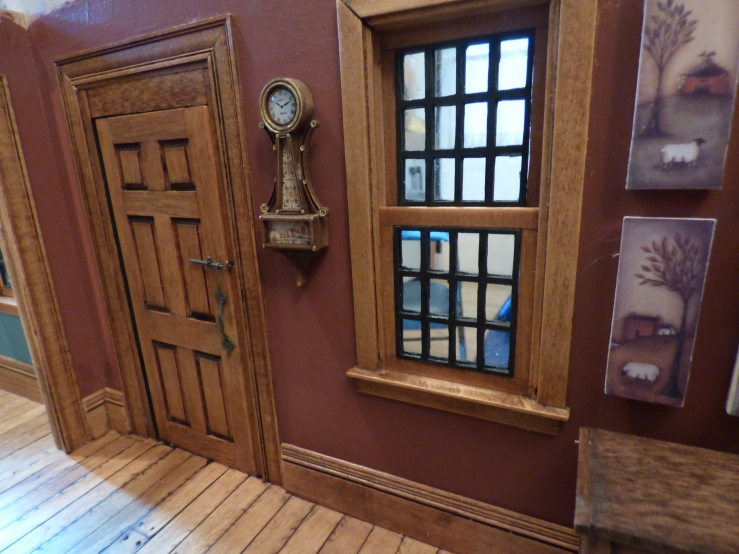
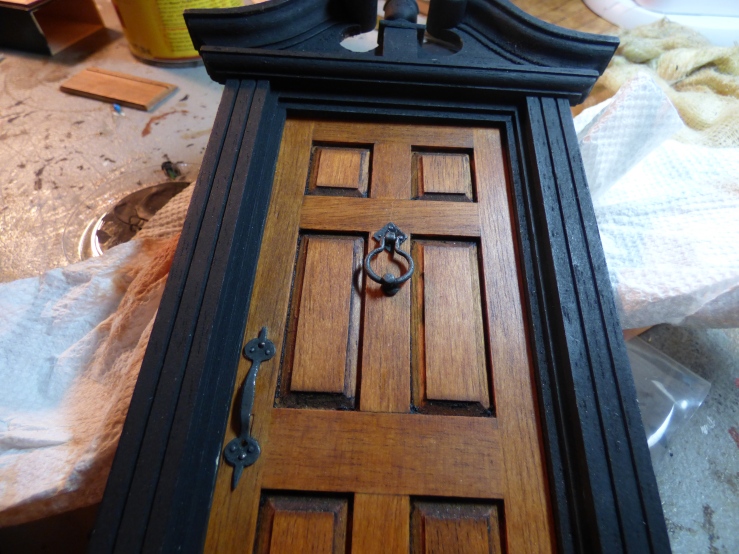
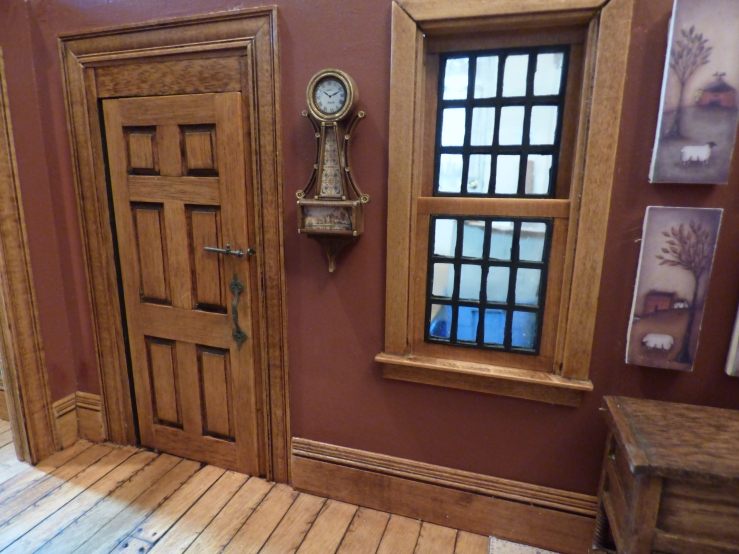
I also finished the front door with a replica of a colonial door knocker, handles and dead bolt.

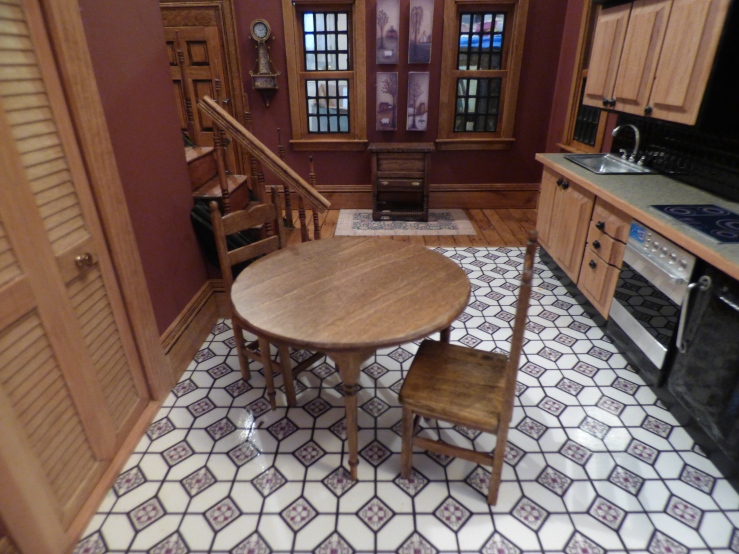
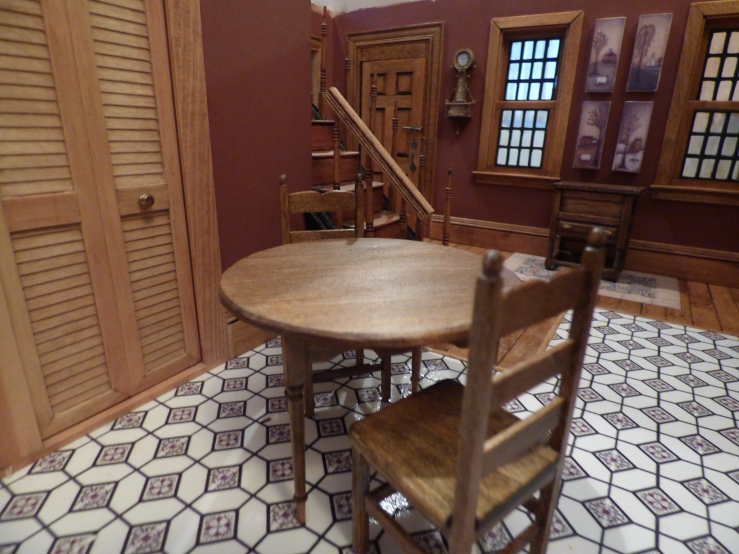
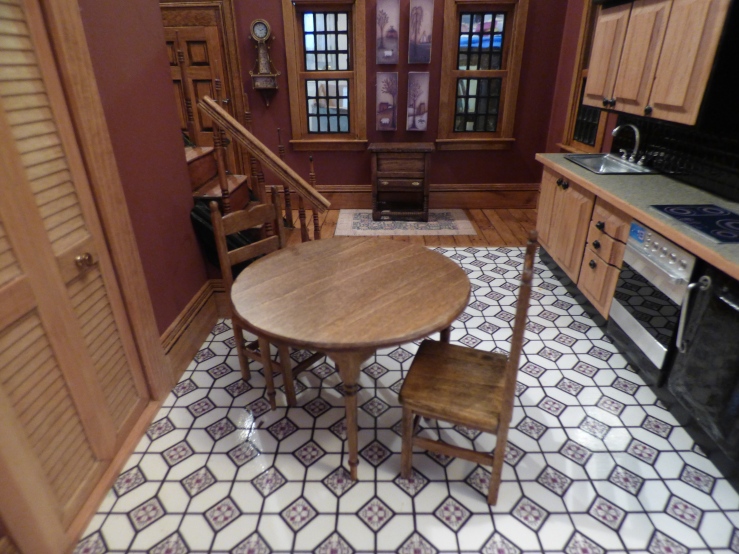
P1000262The coat rack is up and the boot tray is tucked in just waiting for a little coat and shoes to finish them off.  I added the kitchen table and chairs and an HOM kit piece just to see the kitchen come to life a bit, but please excuse any bunny hair floating around in the photos. I have six of them all shedding like they’re prepping for a tropical getaway.
P1000291

P1000298

P1000286

P1000292P1000300

P1000301

P1000305

P1000307


P1000316

P1000317

With the deadline only a week away, I have no illusions that I’m going to finish this house!  But if I get the living room complete by then, I’ll be content.  It’s a good thing I’m not a contractor – there’d be some poor family camped out in their back yard for YEARS while I was putting up their house in fits and starts.  They’d finally throw their tent and sleeping bags into their car and abandon the whole shebang while I was busting out the kitchen with a sledgehammer for the third time.

I’ve started the sofa using a tutorial on the MitchyMoo blog, and by halving the measurements, assembled a matching chair. P1000313 Now, if I don’t change my mind 15 times on what color the upholstery should be, I may just have a living room together by this time next week.  But don’t bet on it yet.  You might have better luck with the next multi-billion Powerball drawing.

But I’m keepin’ on keeping’ on!